Update: I have update this tutorial with a latest release of Apache Solr for Drupal 7 and 8. Read here.
On this quick tutorial, I’ll show you the steps to have a quick default Apache Solr installation using Jetty on an Ubuntu Server 14.04 LTS, which is the latest Ubuntu release. These are the steps you need to set up an Apache Solr multicore on Ubuntu
Get default Java and Jetty, on a terminal window type:
#apt-get install default-jdk jetty libjetty-extra libjetty-extra-java
dowload Apache Solr from archives: https://archive.apache.org/dist/lucene/solr/3.6.2/
#wget https://archive.apache.org/dist/lucene/solr/3.6.2/apache-solr-3.6.2.tgz
Extract the file and move the extrated folder under /opt
#mv apache-solr-3.6.2 /opt
rename the folder to "solr":
#mv apache-solr-3.6 solr
Get Jetty init shell, this file is really important since is the shell script designed so Jetty 6 and Solr 3.x can work together:
#wget http://svn.codehaus.org/jetty/jetty/branches/jetty-6.1/bin/jetty.sh or click here
then, remove the default jetty shell, move the new shell file to /etc/init.d folder and give it correct permissions:
#rm /etc/init.d/jetty
#cp jetty.sh /etc/init.d/jetty
#chmod 755 /etc/init.d/jetty
*Optional: create Sorl user, this one is optional since Jetty creates a jetty user on the system by default which you can use instead of creating a new one.
#useradd -d /opt/solr -s /bin/false solr
#chown solr:solr -R /opt/solr
create Solr logs folder:
#mkdir -p /opt/solr/logs
#chown solr:solr -R /opt/solr/logs
create logging file required by Solr:
#nano /opt/solr/example/etc/jetty-logging.xml
and paste the following xml:
    <?xml version="1.0"?>
  <!DOCTYPE Configure PUBLIC "-//Mort Bay Consulting//DTD Configure//EN" "http://jetty.mortbay.org/configure.dtd">
  <!-- =============================================================== -->
  <!-- Configure stderr and stdout to a Jetty rollover log file -->
  <!-- this configuration file should be used in combination with -->
  <!-- other configuration files.  e.g. -->
  <!--    java -jar start.jar etc/jetty-logging.xml etc/jetty.xml -->
  <!-- =============================================================== -->
  <Configure id="Server" class="org.mortbay.jetty.Server">

      <New id="ServerLog" class="java.io.PrintStream">
        <Arg>
          <New class="org.mortbay.util.RolloverFileOutputStream">
            <Arg><SystemProperty name="jetty.logs" default="."/>/yyyy_mm_dd.stderrout.log</Arg>
            <Arg type="boolean">false</Arg>
            <Arg type="int">90</Arg>
            <Arg><Call class="java.util.TimeZone" name="getTimeZone"><Arg>GMT</Arg></Call></Arg>
            <Get id="ServerLogName" name="datedFilename"/>
          </New>
        </Arg>
      </New>

      <Call class="org.mortbay.log.Log" name="info"><Arg>Redirecting stderr/stdout to <Ref id="ServerLogName"/></Arg></Call>
      <Call class="java.lang.System" name="setErr"><Arg><Ref id="ServerLog"/></Arg></Call>
      <Call class="java.lang.System" name="setOut"><Arg><Ref id="ServerLog"/></Arg></Call>
  </Configure>
create default Jetty configuration file:
#nano /etc/default/jetty
Copy/paste these lines:
NO_START=0
JAVA_OPTIONS="-Dsolr.solr.home=/opt/solr/example/solr $JAVA_OPTIONS"
JAVA_HOME=/usr/lib/jvm/default-java
JETTY_HOME=/opt/solr/example
JETTY_USER=solr
JETTY_LOGS=/opt/solr/logs
JETTY_PORT=8983
Run Jetty at Startup:
#update-rc.d jetty defaults
By now you should be able to start the Jetty service and visit the Solr page
#service jetty restart
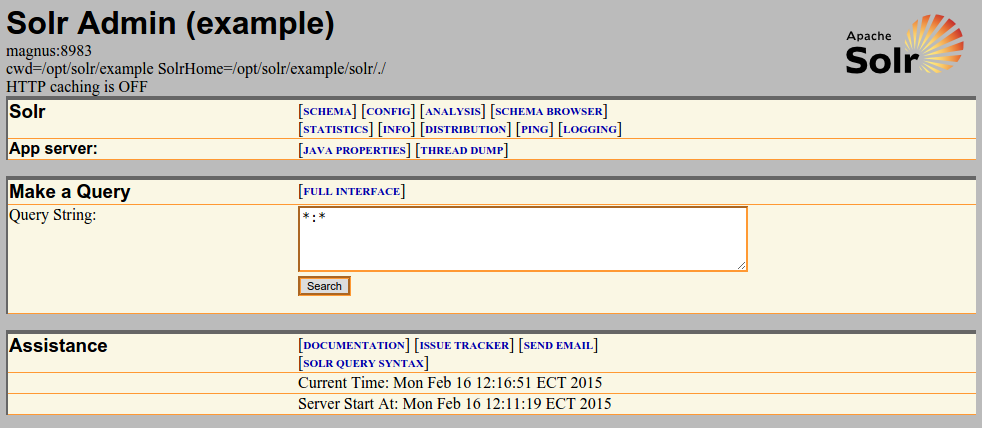
open a browser window and enter http://localhost:8983/solr/admin you'll see Solr admin page up and running just like the screenshot shows.
Thats is all! you now have configured a single core Solr installation using Jetty.
Want to configure multicore support for all you projects? easy! just edit the jetty default file:
#nano /etc/default/jetty
and modify the solr.home line so it looks like:
NO_START=0
JAVA_OPTIONS="-Dsolr.solr.home=/opt/solr/example/multicore $JAVA_OPTIONS"
JAVA_HOME=/usr/lib/jvm/default-java
JETTY_HOME=/opt/solr/example
JETTY_USER=solr
JETTY_LOGS=/opt/solr/logs
JETTY_PORT=8983
The multicore/ folder inside /opt/solr/example has the initial configuration of sample cores so you can start using them or add new ones, remember to add new core to the solr.xml file included in the same folder.
Restart Jetty:
#service jetty restart
and visit the Solr Core page in order to see the list of available core in you system http://localhost:8983/solr/ and you should see a list as the screenshot shows:

Hope it helps!