Development and put on production of Drupal 8 sites is moving really fast, and demanding sites are always going to require strong search engines to quickly process thousands of search requests to their sites. On this tutorial I'm going to show you how to install an Apache Solr server to index any Drupal 8 data for fast search queries and results. Drupal 7 sites will also benefit of this since we are taking advantage of the Search API and Search API Solr modules integration.
Drupal 8 requires a minimum version of Solr 4.x so for this tutorial we'll be using 4.5.1, we'll be also configuring our installation using Jetty 9 (a servlet container for java apps) for easy handling of Solr so it runs as a service on our operating system, making this approach excellent for both, production or development purposes. Ok, let's begin.
First, we need the basic packages from the Ubuntu repository:
$sudo apt-get install default-jdk jetty9Now we need to download Apache Solr from the Apache Lucene archives and prepare files and directories of our Solr core:
$cd ~
$wget http://archive.apache.org/dist/lucene/solr/4.5.1/solr-4.5.1.tgz
$tar -xvzf solr-4.5.1.tgz
$mv solr-4.5.1 solr
$sudo mv solr/ /opt/
$sudo mkdir /opt/solr/logs
$sudo chown -R jetty:jetty /opt/solr
$sudo chmod 0775 -R /opt/solr
Let's now configure Jetty, we need to edit the default config file:
$sudo nano /etc/default/jetty9and you can safely replace the default content of the file with the following:
NO_START=0
JAVA_HOME=/usr/lib/jvm/default-java
JAVA_OPTIONS="-Xmx256m -Djava.awt.headless=true -Dsolr.solr.home=/opt/solr/example/solr $JAVA_OPTIONS"
JETTY_USER=jetty
JETTY_HOME=/opt/solr/example
JETTY_ARGS="jetty.port=8983"
JETTY_LOGS=/opt/solr/logs
Ok, now we need to create symbolic link to the .ini file required by Jetty 9:
$sudo ln -s /usr/share/jetty9/start.ini /opt/solr/example/start.iniWe need to replace the provided jetty.sh script with a generic one, I took one from a standalone Jetty 9 that I got from the Jetty website since the one that gets installed with the Ubuntu package fails when starting the service, you can use any jetty.sh script from any Jetty version equals to 9. Replace the current with the downloaded:
$cd ~
$wget http://central.maven.org/maven2/org/eclipse/jetty/jetty-distribution/9.3.13.v20161014/jetty-distribution-9.3.13.v20161014.tar.gz
$tar -xvzf jetty-distribution-9.3.13.v20161014.tar.gz
$sudo mv /etc/init.d/jetty9 /etc/init.d/jetty9.old
$sudo mv jetty-distribution-9.3.13.v20161014/bin/jetty.sh /etc/init.d/jetty9
$sudo chmod +x /etc/init.d/jetty9
reload the daemon config so changes can take place and then restart Jetty:
$sudo systemctl daemon-reload
$sudo systemctl restart jetty9.service
By now we have configured a single core Solr installation. But we want multicore so we can handle multiple indexes for our different Drupal installations, to do so, edit the Jetty 9 config file:
$sudo nano /etc/default/jetty9and update as follows:
NO_START=0
JAVA_HOME=/usr/lib/jvm/default-java
JAVA_OPTIONS="-Xmx256m -Djava.awt.headless=true -Dsolr.solr.home=/opt/solr/example/multicore $JAVA_OPTIONS"
JETTY_USER=jetty
JETTY_HOME=/opt/solr/example
JETTY_ARGS="jetty.port=8983"
JETTY_LOGS=/opt/solr/logs
The only update we did basically is tell Jetty to point this time to the multicore/ folder in our Solr installation where our multiple cores are going to live, then just restart Jetty:
$sudo systemctl restart jetty9.serviceAnd you should get a screen on your browser similar to the one below where the default cores (core 0 and core 1) are shown:
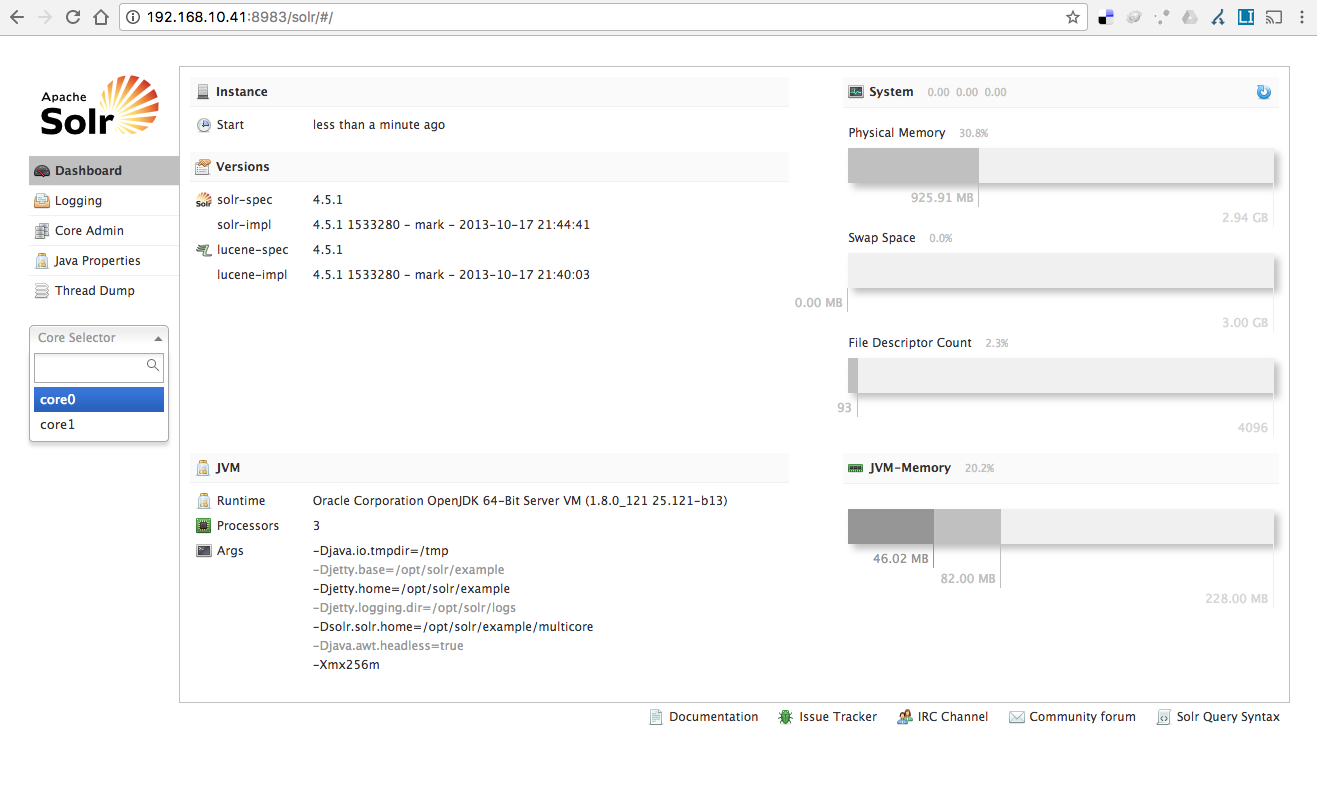
Alright, now that we have a multicore Solr setup, let's configure a core for a fresh Drupal 8. We need to get the Search API Solr module files and extract them into our $HOME folder:
$cd ~
$wget https://ftp.drupal.org/files/projects/search_api_solr-8.x-1.0-beta1.tar.gz
$tar -xvzf search_api_solr-8.x-1.0-beta1.tar.gz
now that we have the config files locally we need to move them to the Solr installation as a new core, so first let's copy to config files to the right place in our system:
$sudo mkdir /opt/solr/example/multicore/drupal8 && sudo cp -r search_api_solr/solr-conf/4.x/ /opt/solr/example/multicore/drupal8/confwith this command we just moved the content from /solr-conf/4.x/ folder to /opt/solr/example/multicore/drupal8/conf folder, this is our new core! index data and config files will reside in this directory.
Finally, don't forget about permissions:
$sudo chown jetty:jetty -R /opt/solr/example/multicore/drupal8/
$sudo chmod -R 0775 /opt/solr/example/multicore/drupal8/
Now that we have the core structure we need to tell Solr of its existence, to do so we need to edit the Solr config file and register our newly created core. Remember to do this every time you create a new core!
$sudo nano /opt/solr/example/multicore/solr.xmland make it look similar to the code below, ideally the core name must match the folder name of your core
<?xml version="1.0" encoding="UTF-8" ?>
<!--
 Licensed to the Apache Software Foundation (ASF) under one or more
 contributor license agreements.  See the NOTICE file distributed with
 this work for additional information regarding copyright ownership.
 The ASF licenses this file to You under the Apache License, Version 2.0
 (the "License"); you may not use this file except in compliance with
 the License.  You may obtain a copy of the License at

     http://www.apache.org/licenses/LICENSE-2.0

 Unless required by applicable law or agreed to in writing, software
 distributed under the License is distributed on an "AS IS" BASIS,
 WITHOUT WARRANTIES OR CONDITIONS OF ANY KIND, either express or implied.
 See the License for the specific language governing permissions and
 limitations under the License.
-->

<!--
 All (relative) paths are relative to the installation path

  persistent: Save changes made via the API to this file
  sharedLib: path to a lib directory that will be shared across all cores
-->
<solr persistent="false">

  <!--
  adminPath: RequestHandler path to manage cores.
    If 'null' (or absent), cores will not be manageable via request handler
  -->
  <cores adminPath="/admin/cores" host="${host:}" hostPort="${jetty.port:8983}" hostContext="${hostContext:solr}">
    <core name="core0" instanceDir="core0" />
    <core name="core1" instanceDir="core1" />
    <core name="drupal8" instanceDir="drupal8" />
  </cores>
</solr>
Ok, now that we have everything in place, we just need to finally restart Jetty one more time:
$sudo systemctl restart jetty9.servicePoint your browser to your Solr server IP and you should see the new core created for your Drupal site! See the following screenshot for reference.
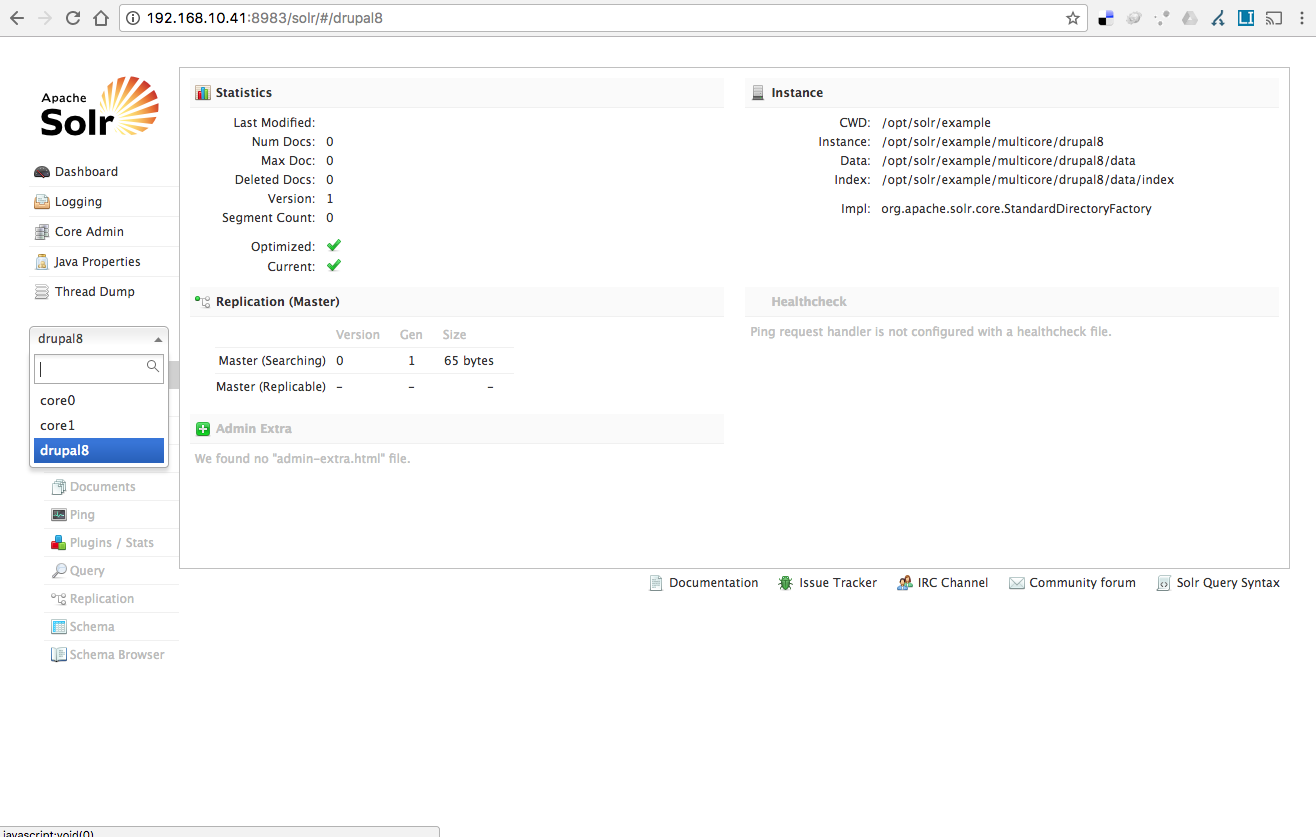
And finally, assuming that you already configured and enabled Search API and Search API Solr modules on your Drupal site, visit your default Solr admin page and configure accordingly, should be as simple as its shown on the following screenshot:

and that's all! You can now start indexing some data to the Solr server and create some cool Views to provide search results of your site.
Hope it helps, enjoy!