On this post, I'll be explaining as granular as possible how to configure an Ubuntu Server so you can run Drupal 7 or Drupal 8 or Drupal 9 sites or any PHP application on your local environment for development. We'll be using Ubuntu 18.04 which is the latest release until the date of this post and the php/apache packages provided by the distro and it will provide PHP 7.2 packages that are recommended for Drupal development.
This post is targeted for Apache Server only, which i think is the most robust web server for Drupal but overall the best option to run PHP applications natively. You can read more on the following links how to configure Drupal for other web servers or configurations such as Nginx if you are interested.
Let's start by getting the required packages:
$ sudo apt-get install php-fpm apache2 libapache2-mod-fcgid mysql-server mysql-client memcached build-essential autoconf php-mysql php-bz2 php-zip php-soap php-memcache php-apcu php-gd php-mbstring php-curl php-cli php-json php-mbstring php-xml php-xdebug git unzip zip curl nodejs npm default-jre
The command above will download and install all the essential modules in Ubuntu required by Drupal and any other PHP app. These include php extensions for mysql connections, debugging with X-Debug, Memcache and Apc support, image manipulation, compression, etc... It will also add Apache 2 Server and required libraries to run php-fpm.
Let's begin with Apache by enabling the following modules:
$ sudo a2enmod alias rewrite proxy_fcgi setenvif expires headers remoteip ssl actions
these are basic Apache modules required by for Drupal or any other PHP app, alias for url aliasing, rewrite for url rewriting proxy_fcgi is the Apache handler for php-fpm, expires for sessions, headers for requests manipulation, remoteip if you want to test your site behind a proxy, ssl to activate HTTPS support for your sites.
Now, enable the default php7.2 fpm config file provided by Ubuntu:
$ sudo a2enconf php7.2-fpm
once enabled, restart the Apache service:
$ sudo systemctl restart apache2
Done, you have configured Apache to use php-fpm to run you PHP applications, but there is still one more step, it is recommended that on every site, meaning every virtual host you create you need to always add the following directive:
<FilesMatch \.php$>
    SetHandler "proxy:unix:/var/run/php/php7.2-fpm.sock|fcgi://localhost/"
</FilesMatch>
So let's add it to the default virtual host:
$ sudo nano /etc/apache2/sites-available/000-default.conf
<VirtualHost *:80>
  # The ServerName directive sets the request scheme, hostname and port that
  # the server uses to identify itself. This is used when creating
  # redirection URLs. In the context of virtual hosts, the ServerName
  # specifies what hostname must appear in the request's Host: header to
  # match this virtual host. For the default virtual host (this file) this
  # value is not decisive as it is used as a last resort host regardless.
  # However, you must set it for any further virtual host explicitly.
  #ServerName www.example.com

  ServerAdmin webmaster@localhost
  DocumentRoot /var/www/html

  # Available loglevels: trace8, ..., trace1, debug, info, notice, warn,
  # error, crit, alert, emerg.
  # It is also possible to configure the loglevel for particular
  # modules, e.g.
  #LogLevel info ssl:warn

  ErrorLog ${APACHE_LOG_DIR}/error.log
  CustomLog ${APACHE_LOG_DIR}/access.log combined

  # For most configuration files from conf-available/, which are
  # enabled or disabled at a global level, it is possible to
  # include a line for only one particular virtual host. For example the
  # following line enables the CGI configuration for this host only
  # after it has been globally disabled with "a2disconf".
  #Include conf-available/serve-cgi-bin.conf

  # Enable php-fpm support for this host:
  <FilesMatch \.php$>
    SetHandler "proxy:unix:/var/run/php/php7.2-fpm.sock|fcgi://localhost/"
  </FilesMatch>

</VirtualHost>
Or you could just comment out the "Require all denied" rule so the change applies globally, I personally prefer this method since helps when testing PHP apps running Apache with libapache2-mod-php so I don't have to worry about adding or removing the rule per virtual host.
$ sudo nano /etc/apache2/conf-available/php7.2-fpm.conf
<FilesMatch ".+\.phps$">
    # Deny access to raw php sources by default
    # To re-enable it's recommended to enable access to the files
    # only in specific virtual host or directory
    #Require all denied
</FilesMatch>
restart PHP so changes can take place:
$ sudo systemctl restart php7.2-fpmAnd there we go! We have configured Apache and PHP using php-fpm which is considered to perform faster on small environments.
In order to test, create a simple PHP file on the default Apache www/ folder where the default virtual host points to:
$ sudo nano /var/www/html/index.phpand paste the following PHP code:
<?php
  echo phpinfo();
?>
Finally, open up a browser window and go to: http://localhost.index.php/ and you should see an output similar as the next screenshot:
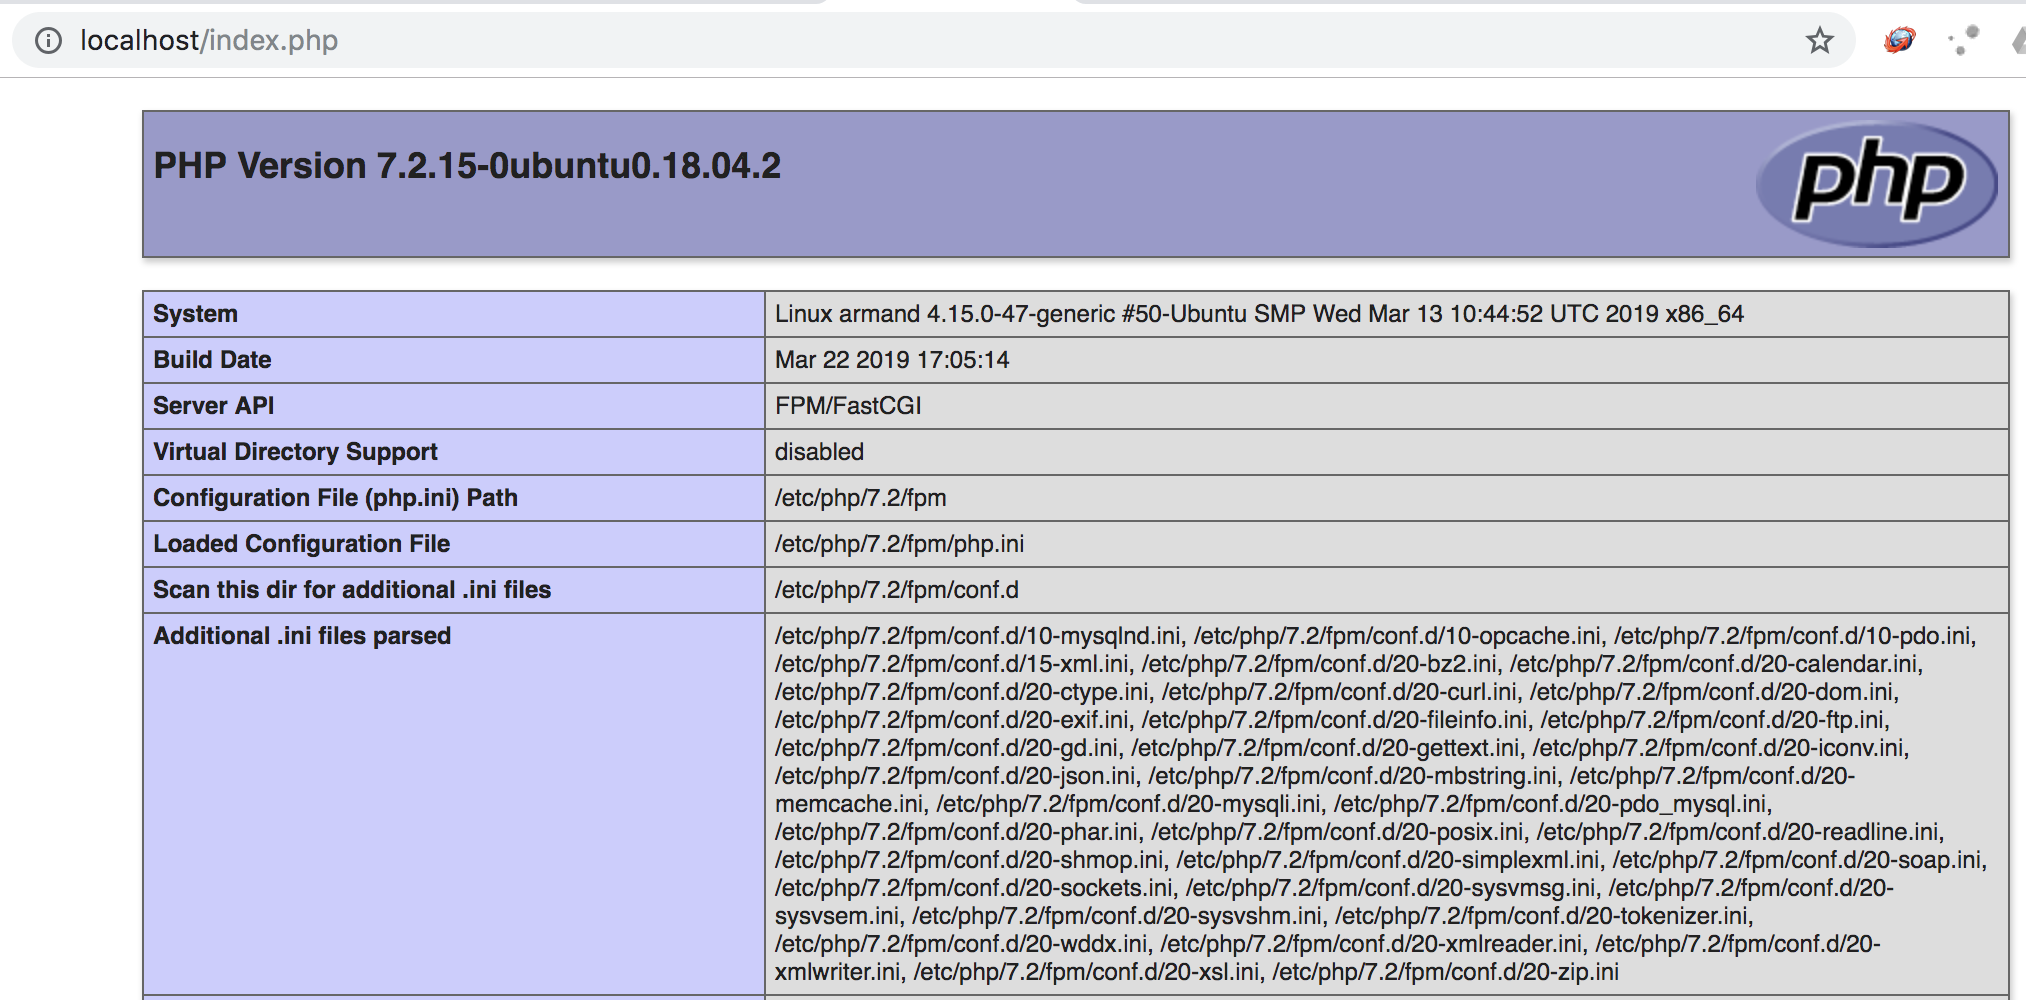
Alright, now we need to tune up a little PHP, let's edit the following values on the loaded configuration file:
$ sudo nano /etc/php/7.2/fpm/php.ini
look for the following directives and update:
max_execution_time = 30 # Set it to 60
max_input_vars = 1000 # Set it to at least 3000
memory_limit = 128M # Set to 256M more it not recommended, better check your code.
error_reporting = E_ALL & ~E_DEPRECATED & ~E_STRICT # Set it to E_ALL on dev we want all errors to be shown.
display_errors = Off # Set it to On
display_startup_errors = Off # Set it to On
post_max_size = 8M # Set it to 512M
upload_max_filesize = 2M # Set to 512M
soap.wsdl_cache_enabled=1 # Set it to 0 on development we don't want to cache soap calls.
Save the file and restart the service:
$ sudo systemctl restart php7.2-fpm
Ok that's it with PHP and Apache you can check the updated values by refreshing your http://localhost/index.php
Keep in mind the the directives above are globally applied and you can always override these at other levels.
Now let's configure some Drupal dependencies required by Drupal 8 and above:
We need Composer installed and running (click here to see how to install composer) so we can download Drush 9 which is required by Drupal core 8.x-4 and above that includes Drupal 9. Since Drupal 7 is still available and you might need to work an a D7 project, you also need Drush 8.
In order to have both Drush 8 and Drush 9 available globally I suggest the following configuration:
$ cd ~
$ mkdir drush9/ && cd drush9/
$ composer require drush/drush
this command will get you the latest Drush 9 release, you'll see a vendor/ folder after process is completed:

Now we need to rename this folder and move it under /opt
$ cd ~/drush9
$ sudo mv vendor/ /opt/drush9 # Move all vendor/ folder and subfolders under /opt and rename it as drush9
And finally we need a symbolic link to the executable:
$ sudo ln -s /opt/drush9/drush/drush/drush /usr/local/bin/drush9
Done, if you run drush9 --version you should get the following output:

Now let's do the same but with Drush 8 so we can handle Drupal 8.x-4 and below and Drupal 7 projects:
$ cd ~
$ wget https://github.com/drush-ops/drush/releases/download/8.2.3/drush.phar # Replace here with the version you need, usually the latest.
$ sudo mv drush.phar /usr/local/bin/drush8
$ sudo chmod +x /usr/local/bin/drush8 # Make the command executable
Type in drush8 --version to see the command working, see screenshot for reference:

Upgrading to newer Drush version should be pretty straightforward, just repeat the same steps described above and always remember to use properly the right Drush version for your projects!
As a side note here, it is recommended to use Drush as a Composer dependency per project but as developers we might be switching from project to project so is better to have a clean environment installation to support these scenarios. If your Drupal project does come with Drush installed as a dependency just use is as /vendor/bin/drush @self status
Next, in your $HOME directory create a folder where all your php projects are going to live:
$ cd ~
$ mkdir www/
$ sudo chmod -R 0775 www/ # Recursively assign folder permissions.
$ sudo chown -R $USERNAME:www-data www/ # Recursively assign ownership. Replace $USERNAME with your Ubuntu username.
If you ever have files permissions issues on your projects living under the new /home/$USERNAME/www/ folder, run:
$ cd ~
$ sudo chmod -R 0775 www/ # Recursively assign folder permissions.
$ sudo chown -R $USERNAME:www-data www/ # Recursively assign ownership. Replace $USERNAME with your Ubuntu username.
Configure Git globally, if needed:
$ cd ~
$ git config --global user.name "John Doe"
$ git config --global user.email johndoe@example.com
And this is a nice feature from Drush, is up to you to run it or not, type in your console:
$ cd ~
$ drush9 init
and you'll get get similar output as shown in the screenshot.
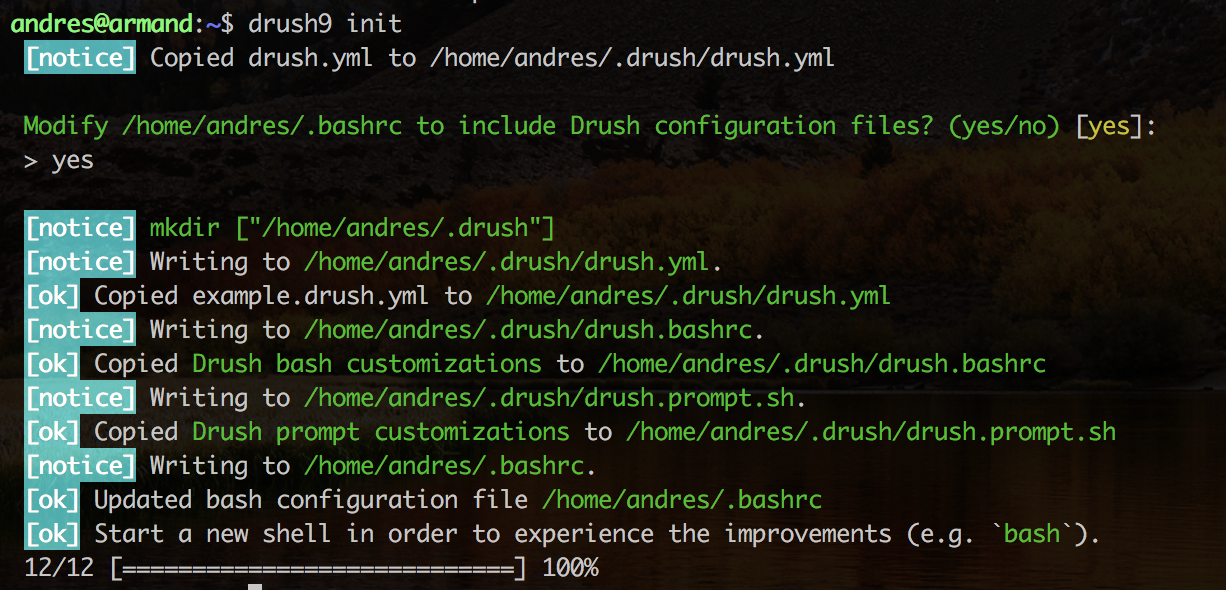
As per Drush documentation the init option will enrich the bash startup file with completion and aliases. If you run this command you might want edit your ~/.bashrc file and comment out the alias to Drush, otherwise the command Drush will be available as alias of drush9 and can cause conflicts and confusion.
$ nano ~/.bashrc
Comment out the following line:
# Path to Drush, added by 'drush init'.
#export PATH="$PATH:/opt/drush9/drush/drush"
and reload:
$ bash
Ok let's move to Mysql, since what we are attempting to create is an "easy-to-work-with local environment", I usually use a single db user for all my projects meaning each of my databases so I can reuse the credentials on my PHP connection config arrays.
Once mysql-server package is installed, you need to update the root user password, to do su just run:
$ sudo mysql_secure_installation
follow the wizard to update the password.
Then, to create a database, login to mysql :
$ sudo mysql -uroot -p # Yes you need sudo on Ubuntu 18.04 mysql 5.7.25 to access the root mysql user.
And run the following sql instructions:
CREATE DATABASE mydbname;
GRANT ALL ON mydbname.* to mydevelopmentuser@'localhost' identified by 'my$trongpassword';
These commands will:
- Create a database named "mydbname".
- Grant all permissions on "mydbname" to the "mydevelopmentuser" user, accepting only 'localhost' connections and with password as string value "my$strongpassword".
As reference see the next screenshot:
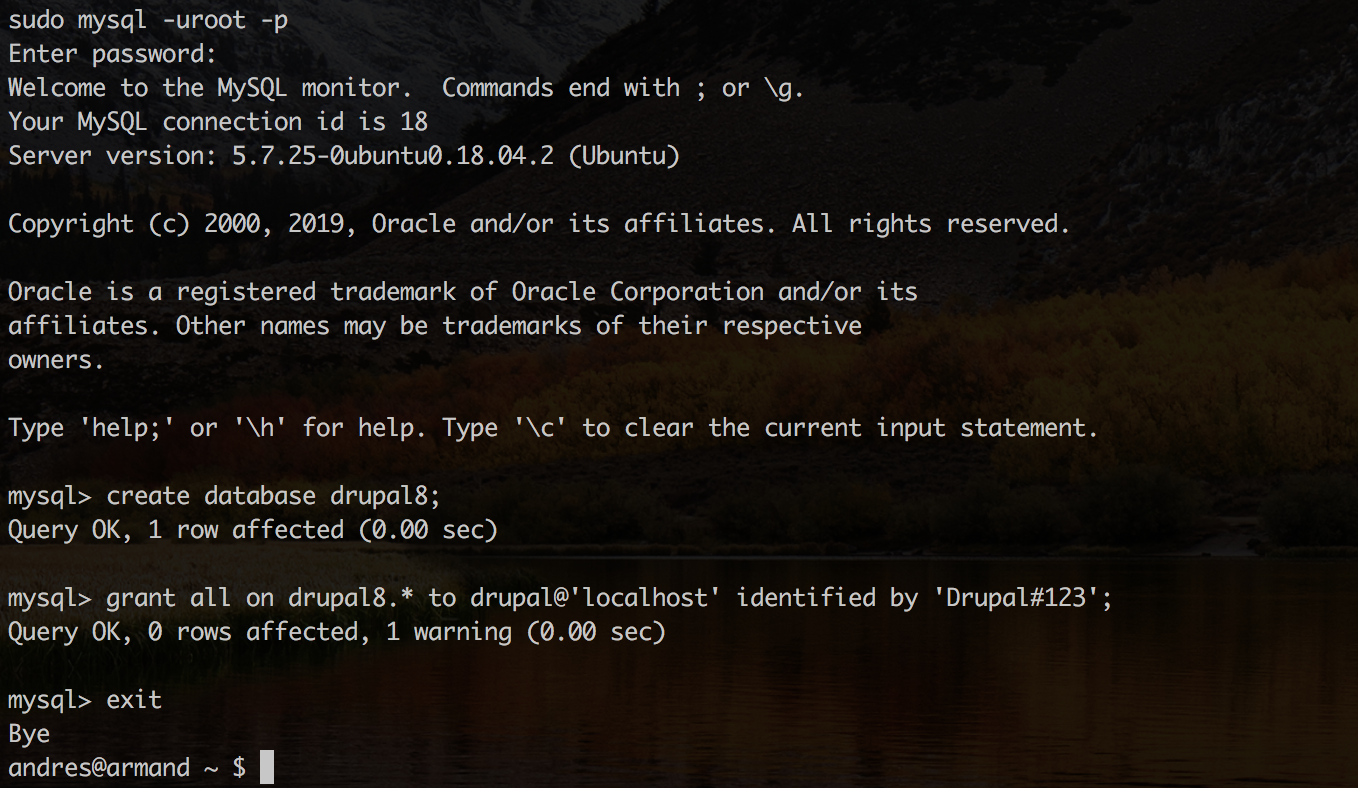
So as I mention, on my PHP connections arrays I always use mydevelopmentuser/my$strongpassword as mysql user so i just need to update the dbname. Replace values as you wish and that's pretty much it with Mysql!.
Now that we have everything in place we can download and install Drupal 8, set up an existing Drupal 7 project or run any PHP web application.
As a sample, let's install a new Drupal 8 site so we can test all the configurations above and make sure our local environment is ready to go:
Step 1 .- MYSQL
As described above, login as Mysql root user and create a new database as explained. Remember those credentials, we will be using them later when configuring our settings.php
Step 2 .- APACHE V-HOST
Edit/create the following file:
$ sudo nano /etc/apache2/sites-available/local.drupal8.com.confpaste the following code:
<VirtualHost *:80>
   DocumentRoot /home/$USERNAME/www/drupal8/docroot
   ServerName local.drupal8.com

   <Directory /home/$USERNAME/www/drupal8/docroot>
       Options Indexes MultiViews FollowSymLinks
       AllowOverride All
       Order allow,deny
       Allow from all
       Require all granted
   </Directory>

  # Uncomment here if you want to enable http auth
  #<Directory /home/$USERNAME/www/drupal8/docroot>
  #  ## Protect Directory
  #  AuthType Basic
  #  AuthName "Restricted Content"
  #  AuthUserFile /etc/apache2/.htpasswd
  #  Require valid-user
  #</Directory>

  ErrorLog /var/log/apache2/local.drupal8.com-error.log
  CustomLog /var/log/apache2/local.drupal8.com-access.log combined
</VirtualHost>
Where $USERNAME is your Ubuntu username, replace accordingly.
Now we need to enable this configuration, remember to do this for each site:
$ sudo a2ensite local.drupal8.com.confAnd restart Apache:
$ sudo systemctl restart apache2.serviceTry to use a standardized naming convention for your virtual hosts definitions, usually it is sitename.conf for http and sitename-ssl.conf for https.
Optional: If you want to enable SSL support for this site, enable the SSL virtual host configuration:
$ sudo nano /etc/apache2/sites-available/local.drupal8.com-ssl.conf<IfModule mod_ssl.c>
<VirtualHost *:443>
DocumentRoot /home/$USERNAME/www/drupal8/docroot
ServerName local.drupal8.com
<Directory /home/$USERNAME/www/drupal8/docroot>
Options Indexes MultiViews FollowSymLinks
AllowOverride All
Order allow,deny
Allow from all
Require all granted
</Directory>
Header always set Strict-Transport-Security "max-age=15768000"
RequestHeader append "X-Forwarded-Proto" "https"
RequestHeader set "X-Forwarded-Ssl" "on"
ErrorLog ${APACHE_LOG_DIR}/local.drupal8.com-error.log
CustomLog ${APACHE_LOG_DIR}/local.drupal8.com-access.log combined
SSLEngine on
SSLCertificateFile /etc/ssl/certs/ssl-cert-snakeoil.pem
SSLCertificateKeyFile /etc/ssl/private/ssl-cert-snakeoil.key
BrowserMatch "MSIE [2-6]" \
nokeepalive ssl-unclean-shutdown \
downgrade-1.0 force-response-1.0
# MSIE 7 and newer should be able to use keepalive
BrowserMatch "MSIE [17-9]" ssl-unclean-shutdown
</VirtualHost>
SSLProtocol all -SSLv3 -TLSv1 -TLSv1.1
SSLCipherSuite ECDHE-ECDSA-CHACHA20-POLY1305:ECDHE-RSA-CHACHA20-POLY1305:ECDHE-ECDSA-AES128-GCM-SHA256:ECDHE-RSA-AES128-GCM-SHA256:ECDHE-ECDSA-AES256-GCM-SHA384:ECDHE-RSA-AES256-GCM-SHA384:DHE-RSA-AES128-GCM-SHA256:DHE-RSA-AES256-GCM-SHA384:ECDHE-ECDSA-AES128-SHA256:ECDHE-RSA-AES128-SHA256:ECDHE-ECDSA-AES128-SHA:ECDHE-RSA-AES256-SHA384:ECDHE-RSA-AES128-SHA:ECDHE-ECDSA-AES256-SHA384:ECDHE-ECDSA-AES256-SHA:ECDHE-RSA-AES256-SHA:DHE-RSA-AES128-SHA256:DHE-RSA-AES128-SHA:DHE-RSA-AES256-SHA256:DHE-RSA-AES256-SHA:ECDHE-ECDSA-DES-CBC3-SHA:ECDHE-RSA-DES-CBC3-SHA:EDH-RSA-DES-CBC3-SHA:AES128-GCM-SHA256:AES256-GCM-SHA384:AES128-SHA256:AES256-SHA256:AES128-SHA:AES256-SHA:DES-CBC3-SHA:!DSS
SSLHonorCipherOrder on
SSLCompression off
SSLSessionTickets off
SSLUseStapling on
SSLStaplingResponderTimeout 5
SSLStaplingReturnResponderErrors off
SSLStaplingCache shmcb:/var/run/ocsp(128000)
</IfModule>
Note that this virtual host is using self-signed certificates. You can learn here how to create valid ssl certificates with Let's Encrypt.
Step 3 .- Drupal:
Download Drupal 8 using our drush8 or drush9 commands:
$ cd ~/www
$ drush8 dl drupal # this will get you the latest D8 release available.
$ mv drupal-8.6.14/ docroot/ # just a little renaming.
$ mkdir drupal8/
$ mv docroot/ drupal8/
$ sudo chmod -R 0775 drupal8/ # Update folder permissions recursively.
$ sudo chown -R $USERNAME:www-data drupal8/ # Update ownership recursively, repace $USERNAME with your Ubuntu username. FYI - www-data is the Apache default user.
Now that we have the files on our project root, the database and its credentials, the virtual hosts configurations, let's once again use Drush to install the site:
$ cd ~/www/drupal8/docroot
$ drush si standard --db-url=mysql://[db_user]:[db_pass]@localhost/[db_name] # Replace accordingly with your values!!
If the command above runs successfully you should see an output similar to the following:

As a final step we need to edit our hosts file in our server and any other computer attempting to access our site so we can force local.drupal8.com to point to our server, this file is located in /etc/hosts on Linux and Mac.
$ sudo nano /etc/hosts
add the following entry, do the same for new sites.
127.0.0.1 local.drupal8.com
And that's all! Open a browser window and visit local.drupal8.com and you should see your new fresh Drupal 8 site as shown in the next screenshot.
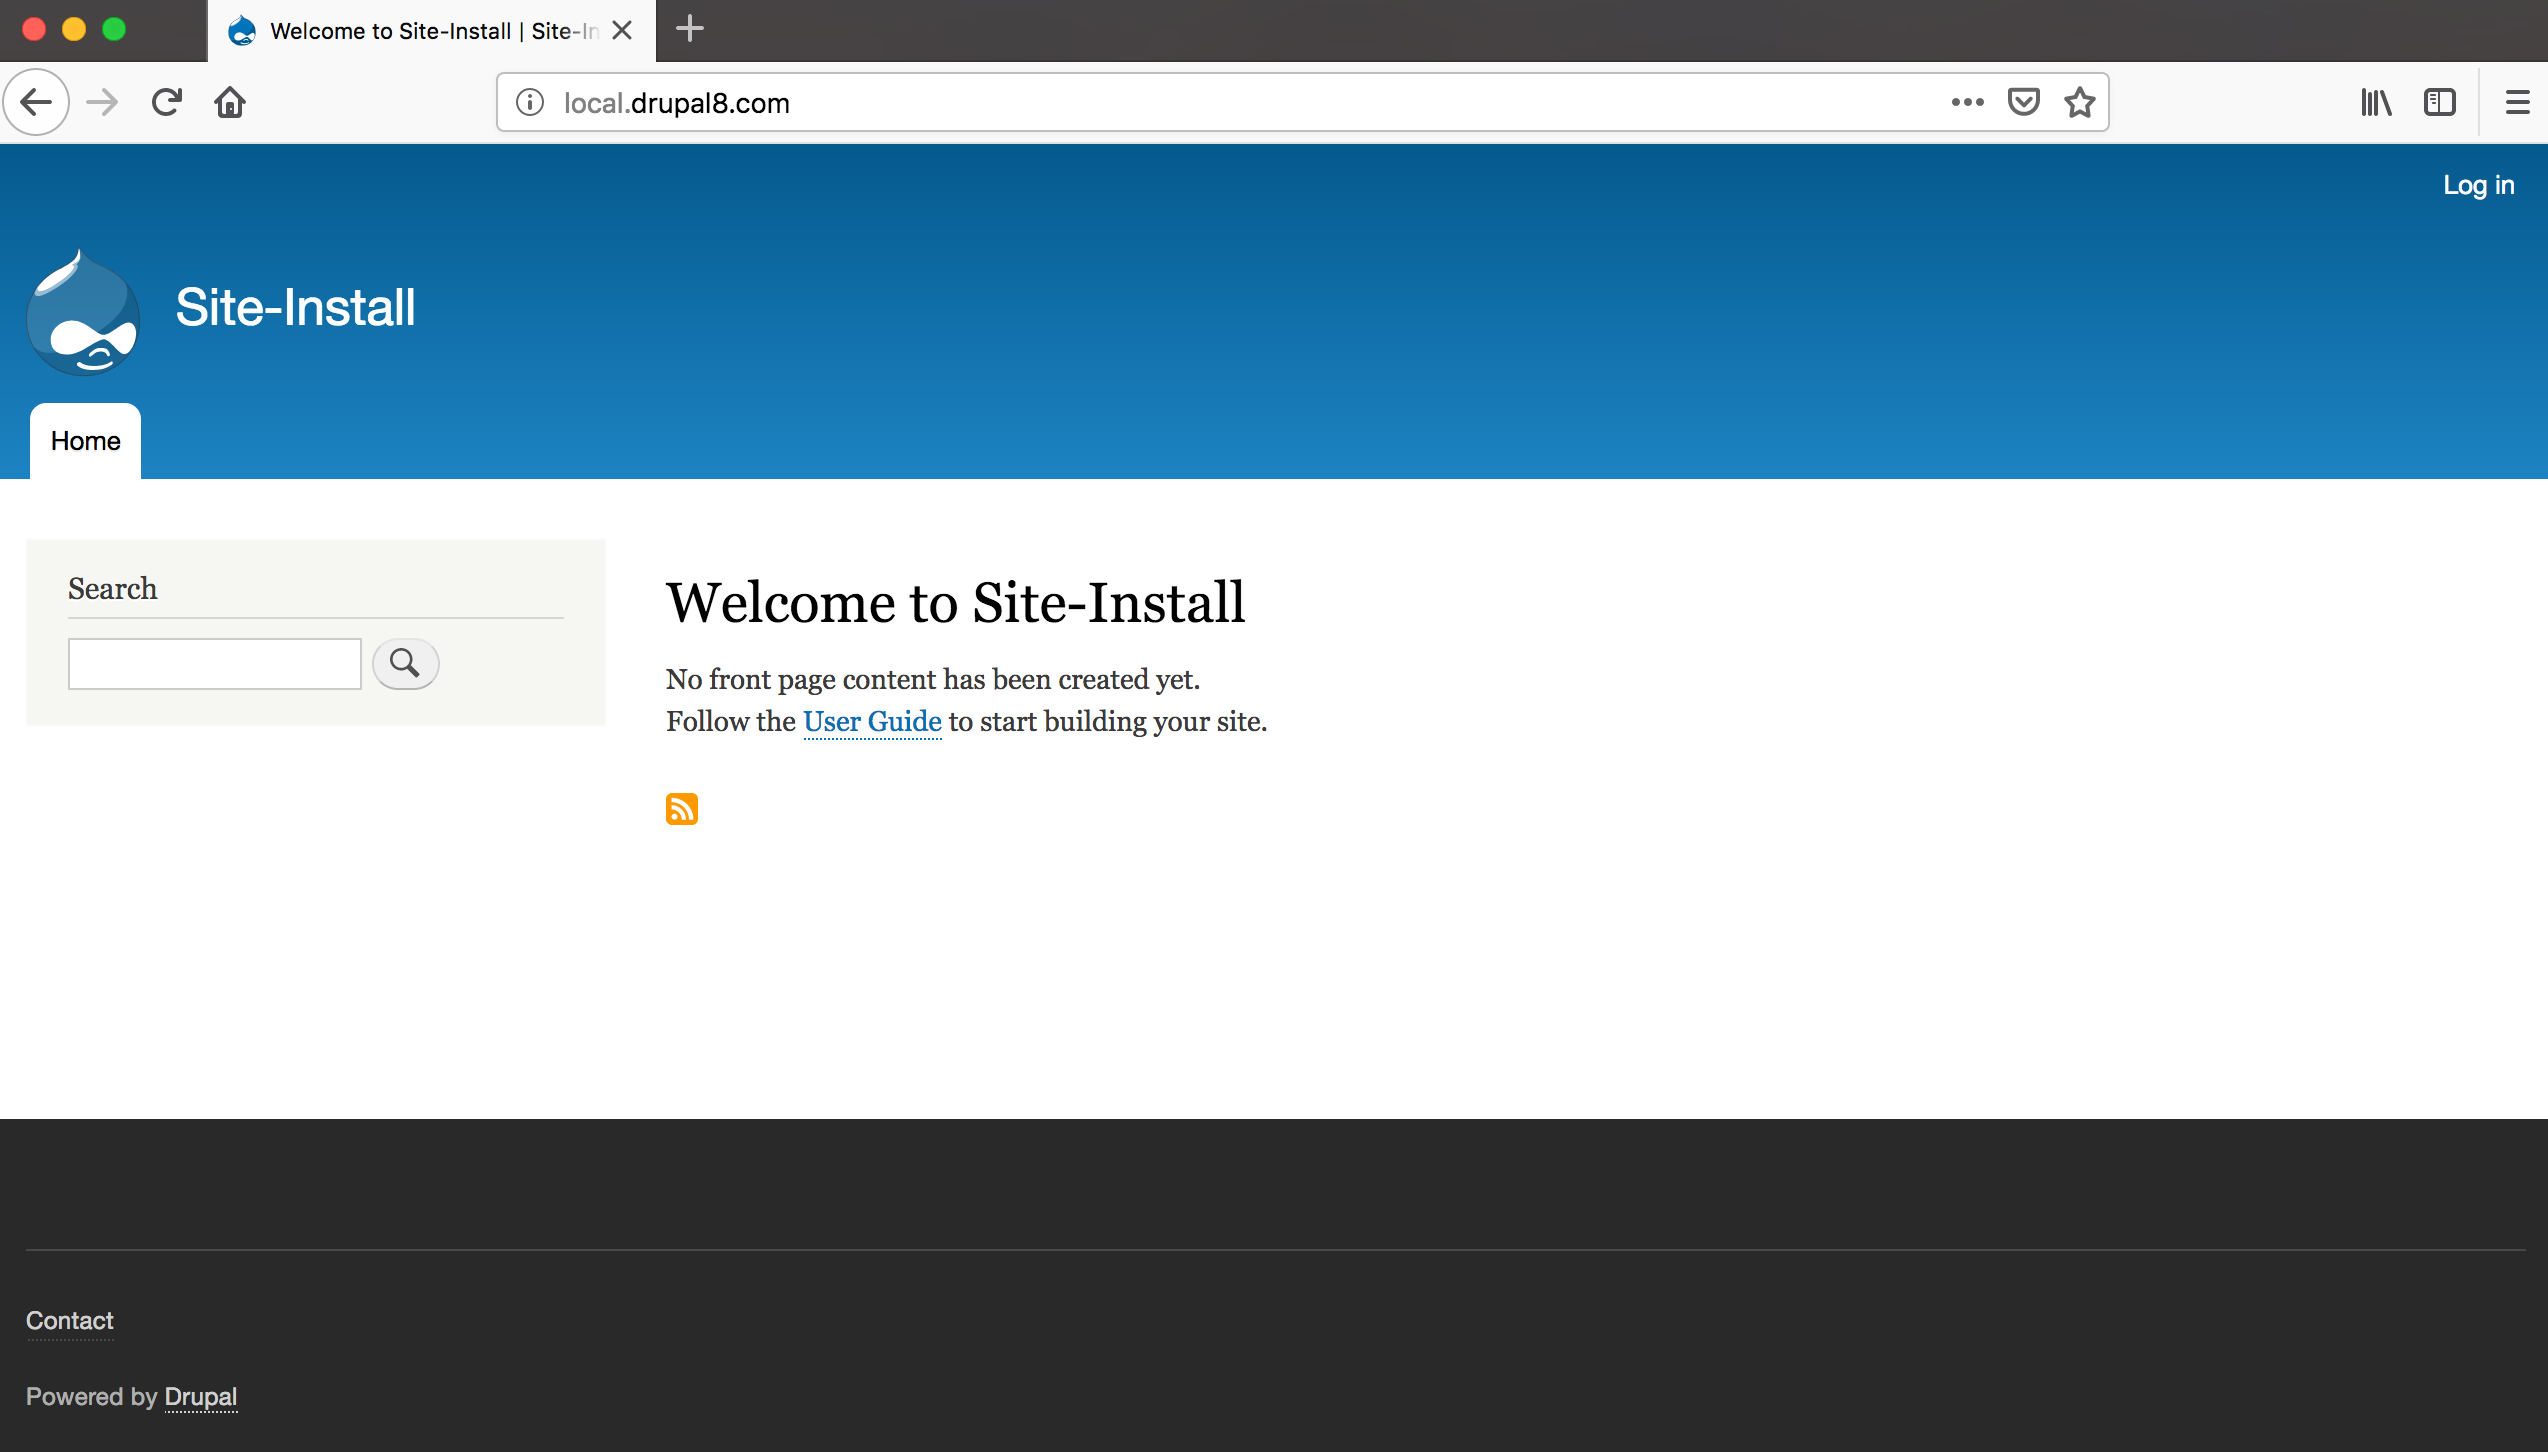
You can also add drush aliases for you projects as follows:
For Drush 8:
$ cd ~
$ nano ~/.drush/local.drupal8.aliases.drushrc.php
And paste the following snippet:
<?php

$aliases["local.drupal8.com"] = array (
  'root' => '/home/$USERNAME/www/drupal8/docroot',
  'uri' => 'http://local.drupal8.com',
  'path-aliases' =>
    array (
      '%drush' => '/usr/local/bin/drush9',
      '%site' => 'sites/default/',
    ),
);

?>
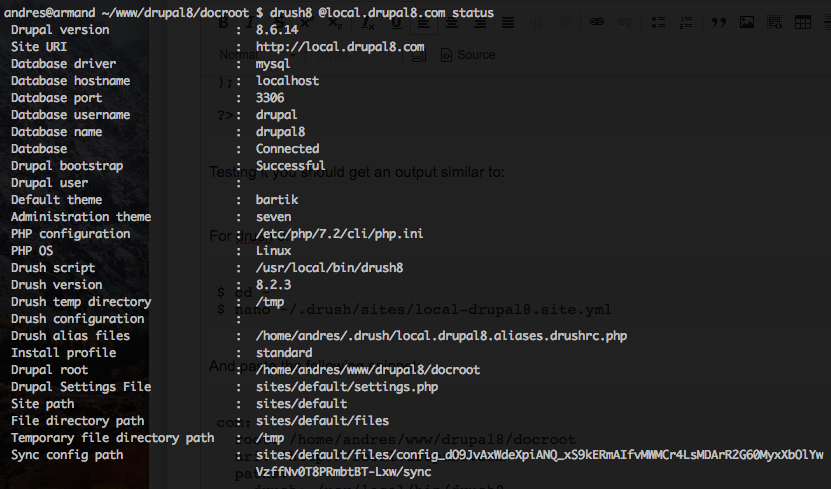
Testing it you should get an output similar to:
For Drush 9:
$ cd ~
$ nano ~/.drush/sites/local-drupal8.site.yml
And paste the following snippet:
com:
  root: /home/$USERNAME/www/drupal8/docroot
  uri: 'http://local.drupal8.com'
  paths:
    drush: /usr/local/bin/drush9
    site: sites/default/
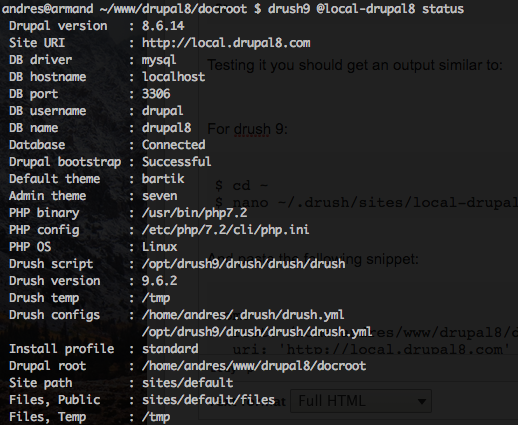
Testing it you should get an output similar to:
I hope all the above set of instructions might add some value to your development process, please let me know your comments or recommendations. Enjoy!
