Hi, on this blog post I'll will show you how to set up a Drupal Development Environment under VirtualBox which is a virtualization tool that allows us to create Virtual Machines or in our case Virtual Private Servers (VPS).
I'm writing this post so developers can have a different alternative to the current Dockerized solutions such as Lando, Docksal or DDEV since I have found, during the time these tools are out, developers struggling a lot with their configuration, performance and set up of Drupal projects. Even though I agree they can save us sometime with some processes once a project is set up or updated and they might be good to cover up for some Non-Linux users so they don't have to deal with Linux commands I think having a bit of knowledge of Linux is key when it comes to working with LAMP based applications. Using a Virtualized component or a Virtual Machine to set up your Drupal/PHP projects will not only help you understand a new technology besides Docker, but feel the impact on performance, learn how to install a Linux server and configure step by step your LAMP stack, always keep in mind that mimicking your Production Environment will reduce the chance of errors in a big percentage when a deployment is performed.
Well, let's begin.
1.- Virtualbox
Go to the VirtualBox page and download the package depending on your Operative System, I'm going to be using a Mac so I'll be downloading the .dmg image. At the time of this post VirtualBox current version is 7.0.10. Next, run the install process:
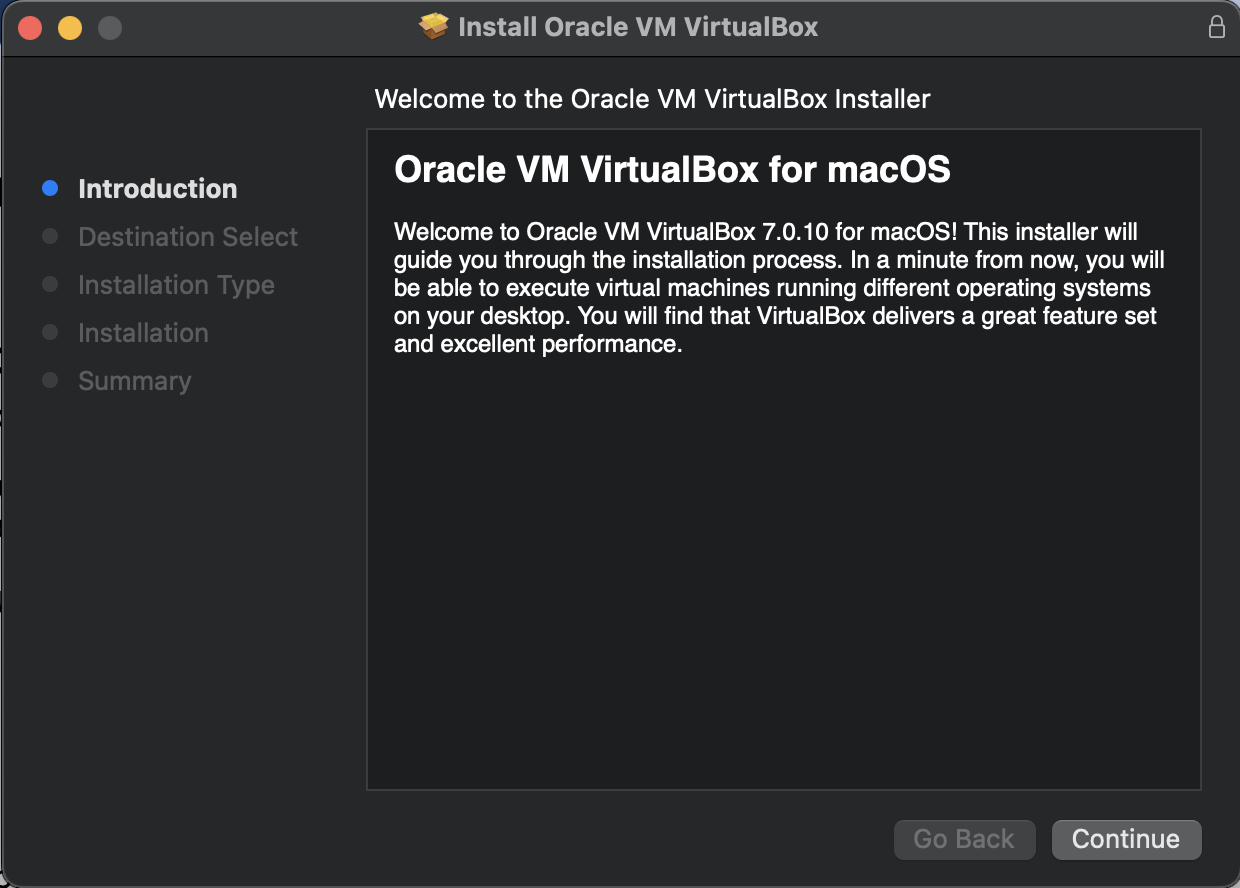
Installing VirtualBox is a pretty straightforward procedure so I usually use the defaults so click on "Continue" until the installation process finishes. If all went well you should get a window like the following:
Once installed, open up a terminal window and run:
## Add your user to the vboxusers group.
$ sudo usermod -a -G vboxusers $USER
Then, just look in your Operative System for the VirtualBox launcher and launch the application, the screen you should get must look like this:
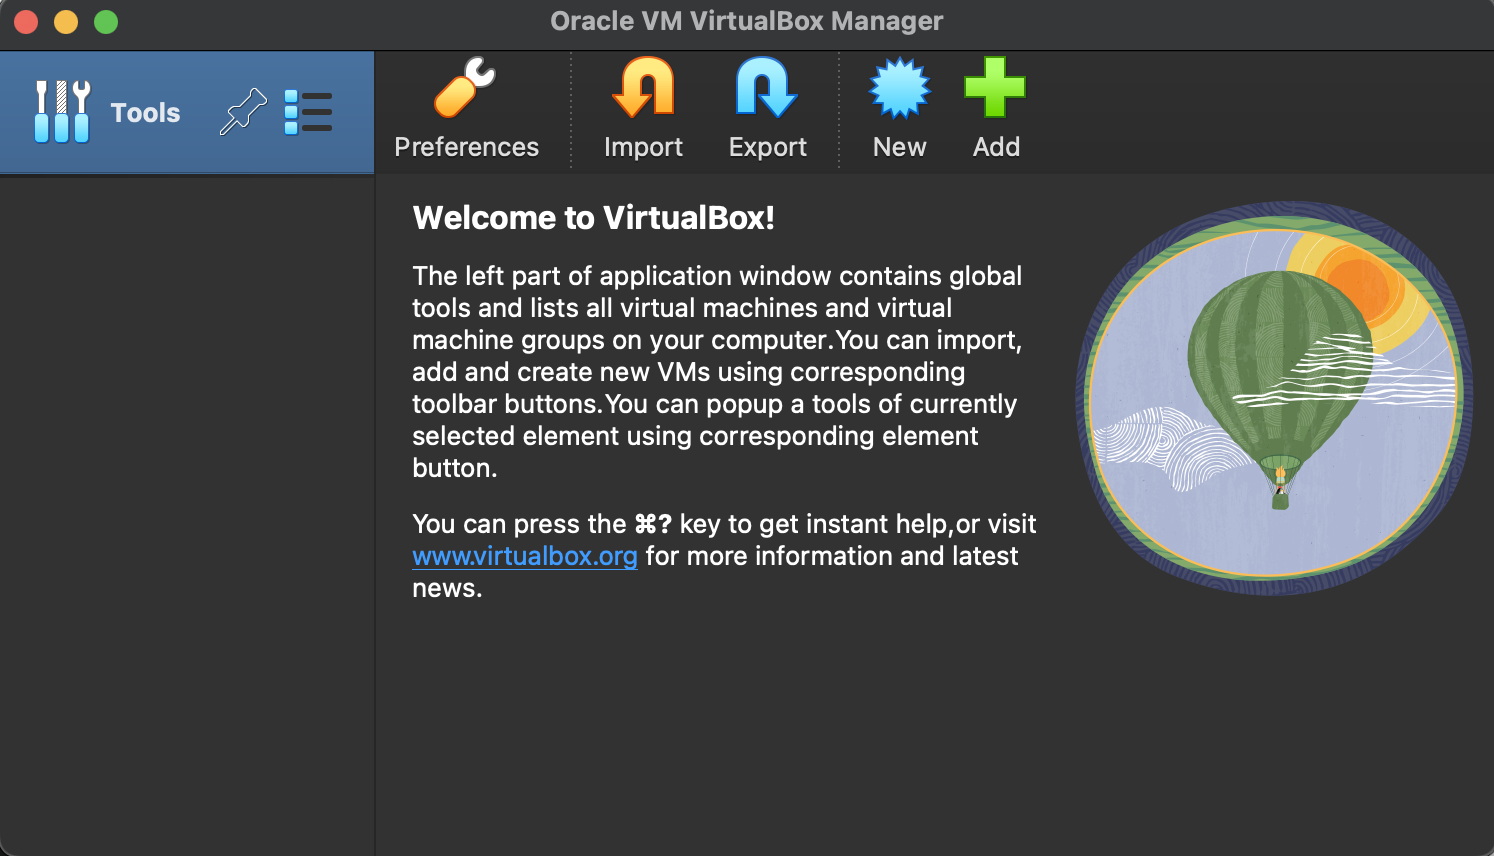
It's also recommended that after installing VritualBox to install the Extension Pack for the version you are installing, here the link for VBox 7.0 Ext Pack.
Now, let the fun begin!
2.- create new virtual machine
First, we need to grab a new Ubuntu Server .ISO image from the Ubuntu website, you can try a different Linux flavor of your preference if you'd like but this post is going to be focused on Ubuntu, here the direct links to download Ubuntu Server 22.04 LTS or Ubuntu Server 24.04 LTS.
Once the .ISO is downloaded, go to VirtualBox and click on the "New" button on the top of the screen, the screen will show up looking like this:
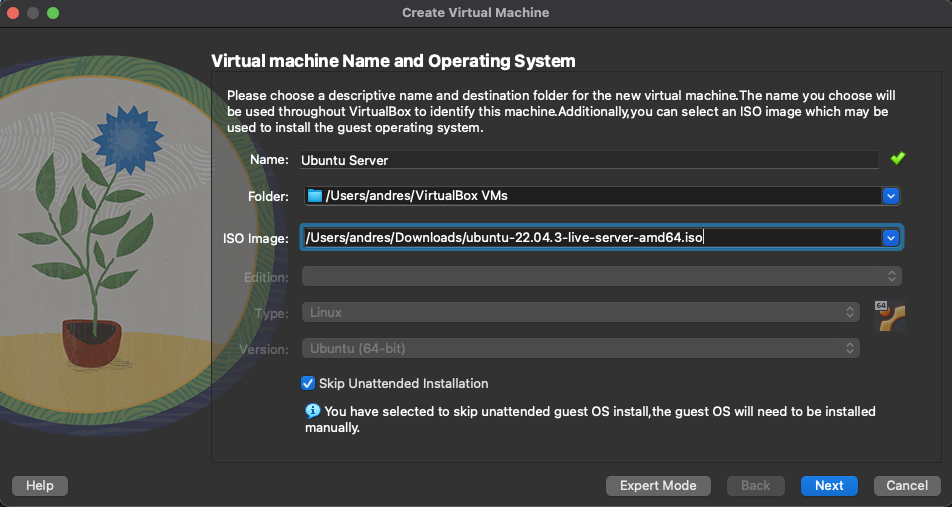
Fill in the next values:
Name: A name for your Virtual Machine of your preference, i.e "Ubuntu Server".
ISO Image: Select the .ISO file you just downloaded.
Type: Usually this is automatic but make sure it is set to Linux.
Version: Make sure is set to "Ubuntu 64 bits".
Skip Unattended Installation: Make sure to Check the box since we will be performing a manual installation.
Then hit Next.
Once you added the settings above, the next step has to do with the resources you'll give to your Virtual Machine, these depend pretty much on your hardware, so be smart do your math depending on you Host OS capabilities, so, for example I have a 8 core CPU processor with 16 GB of RAM so I usually give my development VM 4GBs of RAM and 4 CPU's but again that depends on your hardware, what I'm proposing here is more than enough to run big processes inside you Virtual Machine such as content migration or tough batch processes, etc.
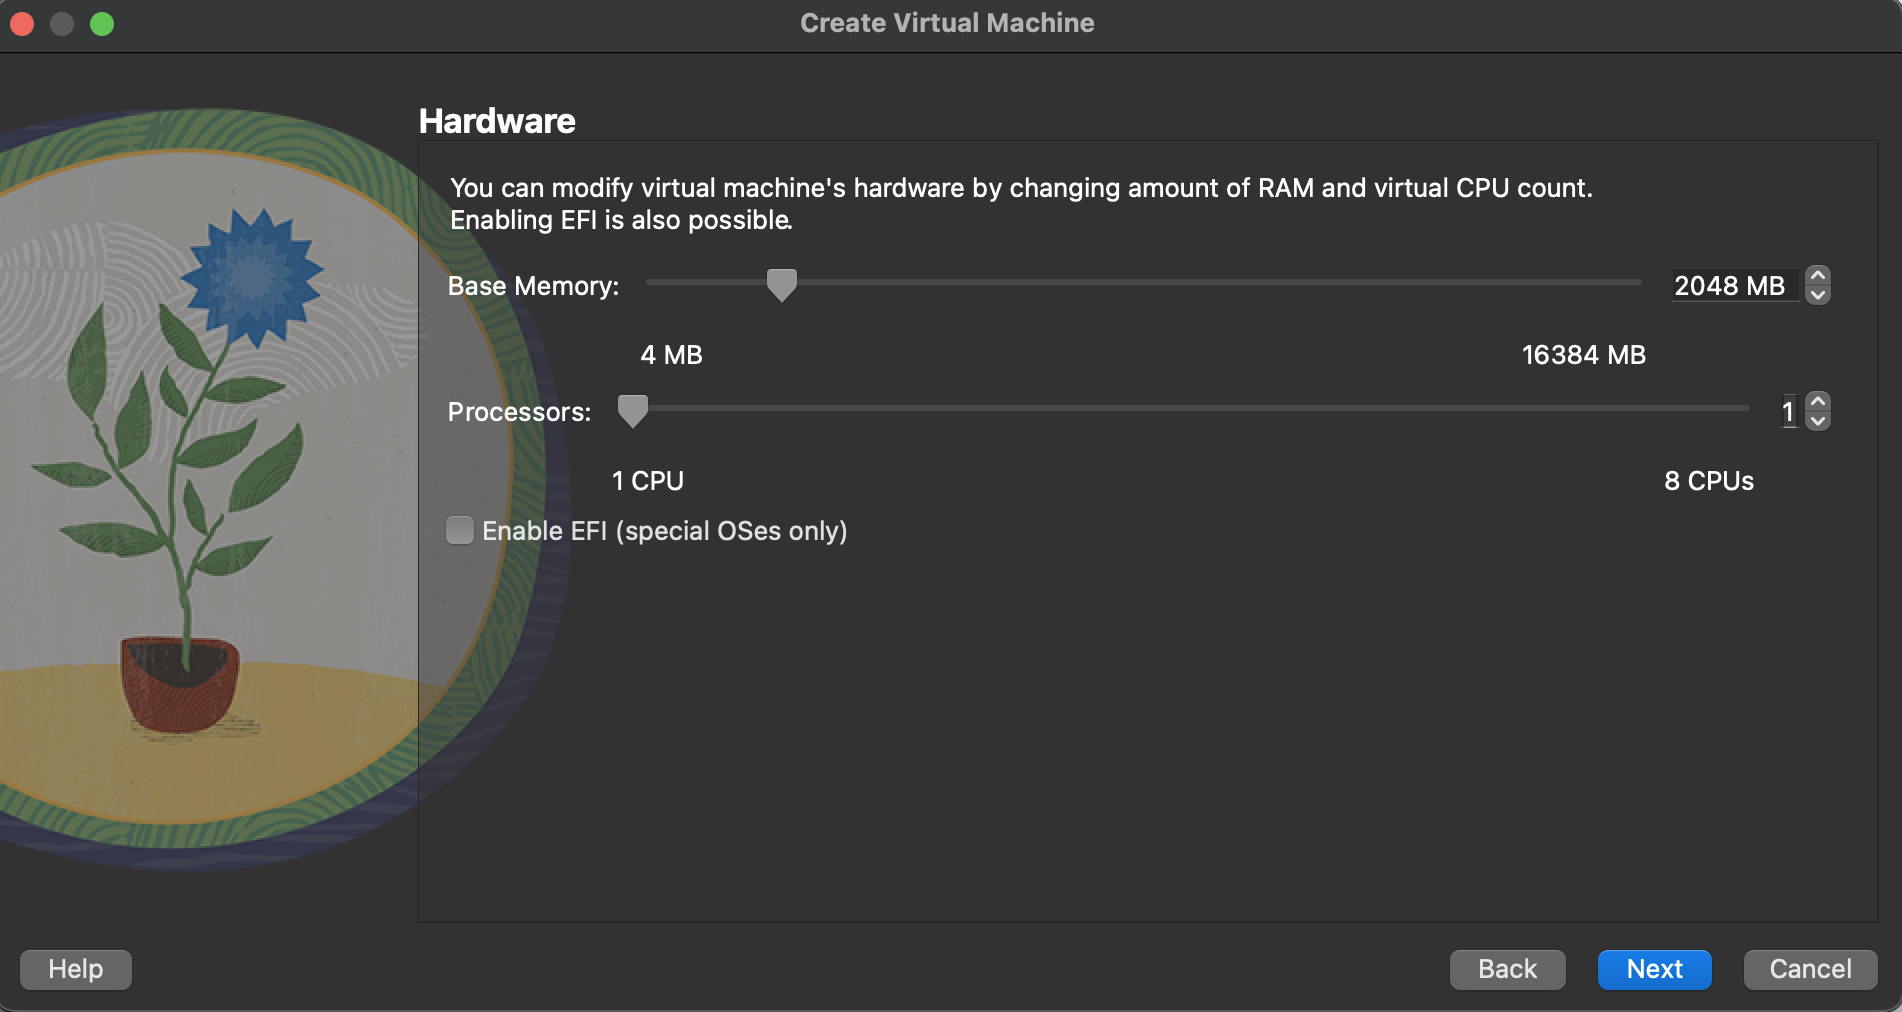
Hit Next.
On this new screen you need to set up your Hard Drive disk space, again do the math based on how many projects you expect to work on. I usually go with 100 GB since projects come and others can be deleted so you can play around with it. Keep in mind that you can always increase the virtual disk size using the tools provided by VirtualBox if necessary.

Hit Next.
Once done with these few steps, you'll get the Summary screen for your new Virtual Machine, just hit finish so we can start with the Ubuntu installation.

Hit Finish.
Once done, your newly create machine will show up on the left menu of the VirtualBox GUI screen.

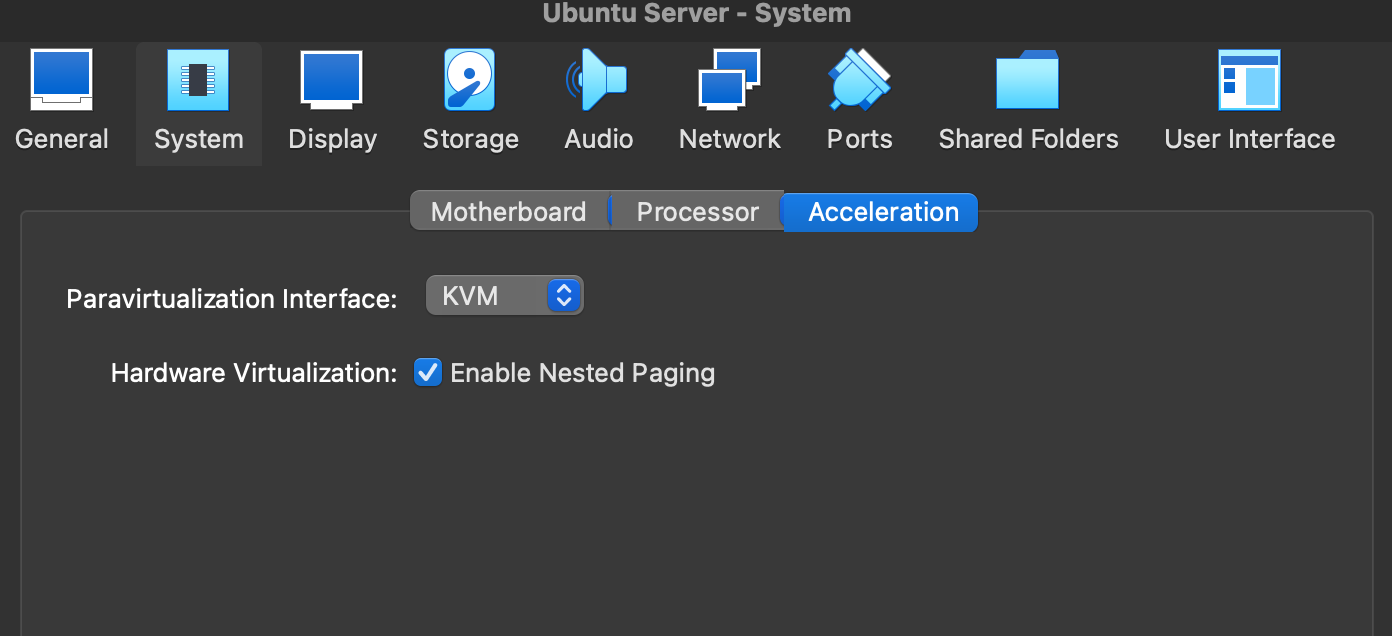
Now let's do some tune up, go to the VirtualBox GUI, select your new Virtual Machine and click on Settings
Select the System Tab and Under Acceleration choose KVM:
Select the Network Tab:
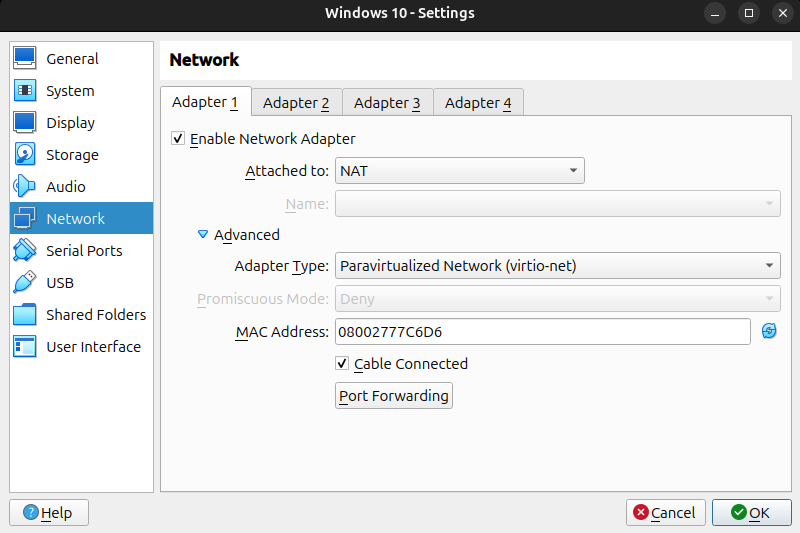
You'll see that NAT is already chosen (Attached to), if not select NAT, and then click on Advanced as for the Adapter Type select Paravirtualized Network (virtio-net) and then click the Port Forwarding button so you can add initial Port Forwarding rules in order to access your Drupal/PHP apps and also SSH to your Virtual Machine. Add as follows:
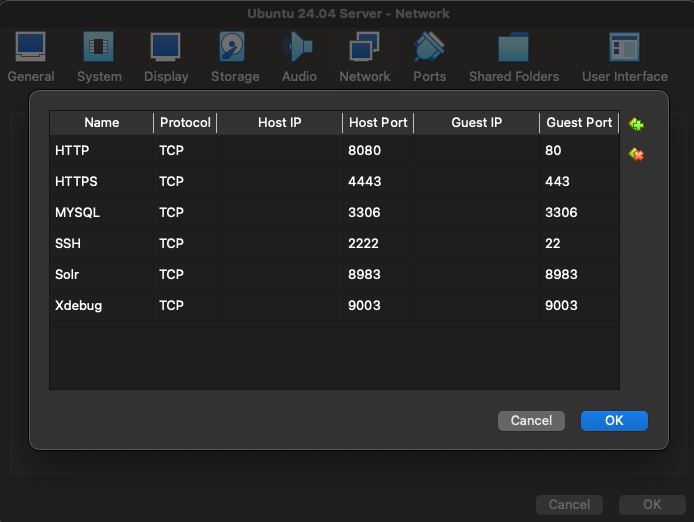
With this configuration, you'll make sure that all connections on port 8080 will reroute to the Virtual Machine on port 80 (HTTP), 4433 to 443 (HTTPS) and 2222 to 22 (SSH). In the screenshot above we are also adding some extra rules for MySQL, Apache Solr and Xdebug. Add as many rules as you want depending on the ports you'll need rerouting.
Important: Remember that for each Virtual Machine you create, a new set of NAT rules should have to be created with different ports forwarding.
Note: I'm using the NAT mode because ideally you'll be using your Host computer without a LAN or WIFI network (same as any Dockerized solution) making your VM always available but if you want to use the Bridge Mode option, just switch to the "Bridge Adapter" under the Network Tab, working with this mode will have your Virtual Machine request an IP Address (DHCP) from your Router and it will behave as any other computer in your network.
Once done with these steps, click on the Start button to begin with the Ubuntu Server installation.
3.- install ubuntu server
NOTE: From down below, the instructions provided here will also work if you prefer to have a Native installation on your Laptop/Desktop using Ubuntu Server or Ubuntu Desktop as the Main Operative System meaning you are not using VirtualBox.
After you hit the Start button on the VirtualBox GUI, a new Window will open up with the first step of the Ubuntu Server installation process.
Select "*Try or Install Ubuntu" and hit enter:
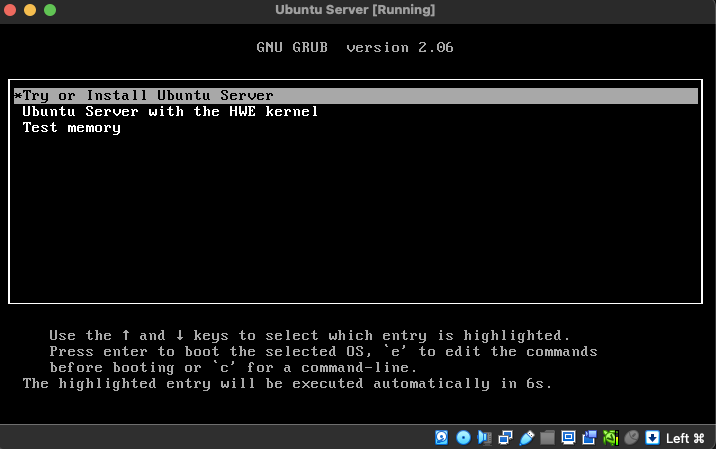
One important thing to notice here once that installation screen is shown, VirtualBox will capture your keyboard and mouse inside so in order to un-capture, look at the bottom right of the screen and it will tell you what key will release your keyboard and mouse so you can navigate to your back to your Host. For example in my case it says "Left Command Key" (MacOS). That will vary depending on your Host OS.
First screen you'll see is the language for your new installation, choose as you will, I'm going to go with English:
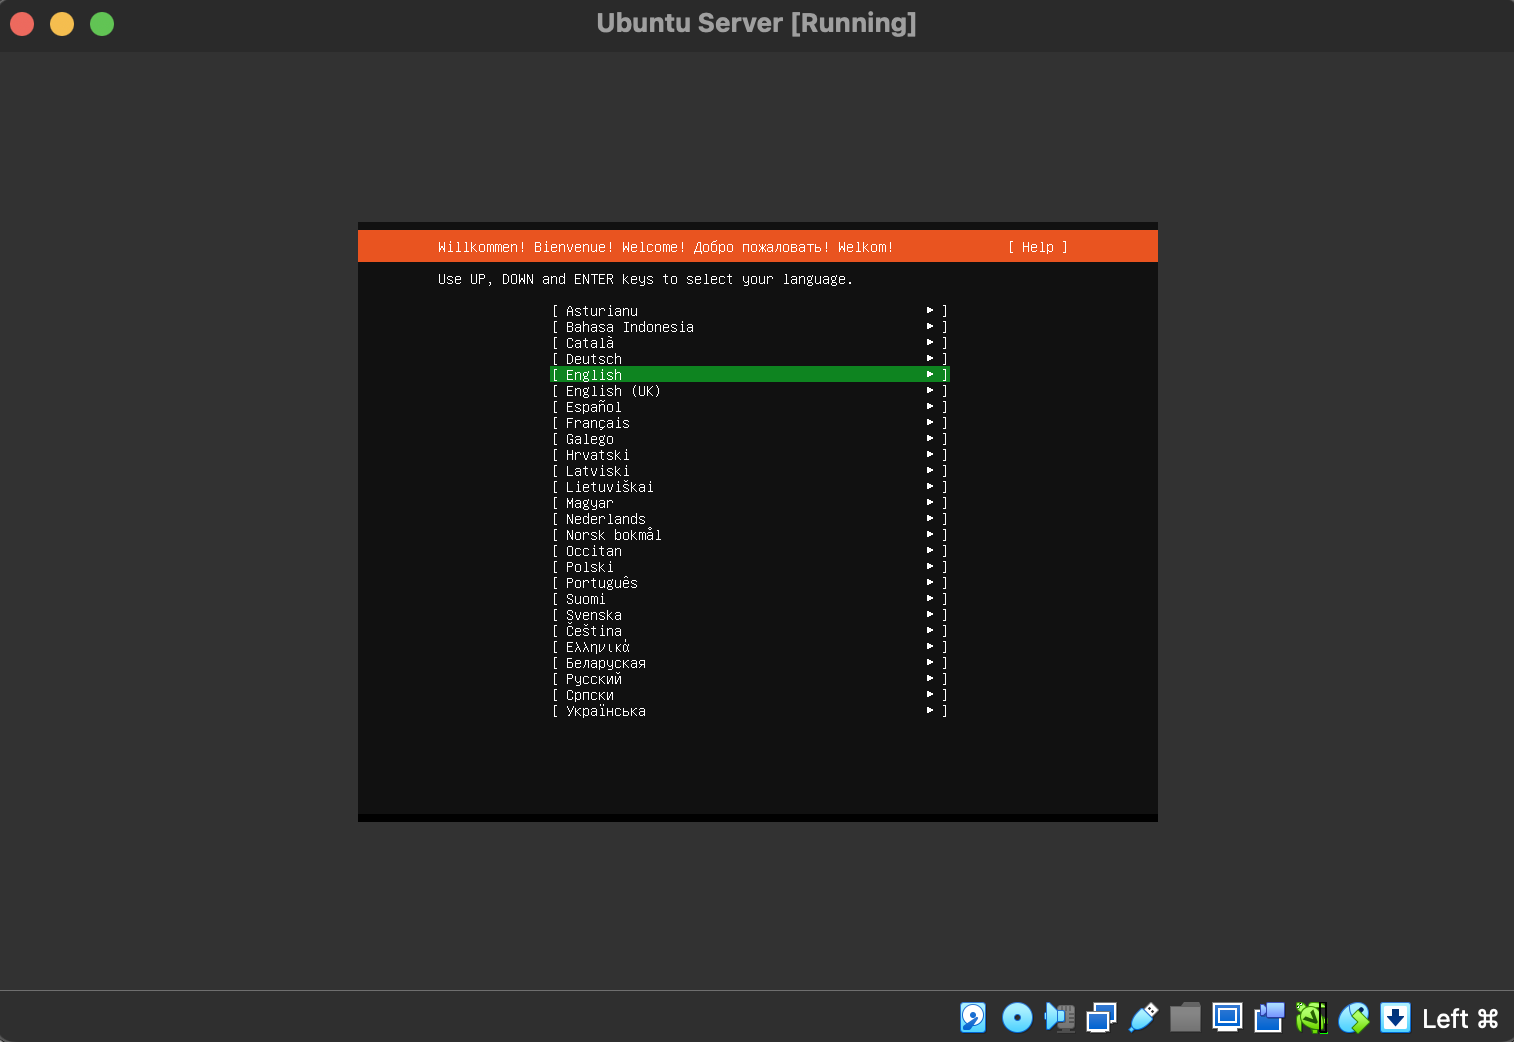
Installing Ubuntu Server Natively or under VirtulBox is also a pretty straight forward process, I mostly go with the defaults. But if you want to change something like the keyboard layout for example just navigate using the Tab key, the Arrows keys, Space key to check options and the Enter key.
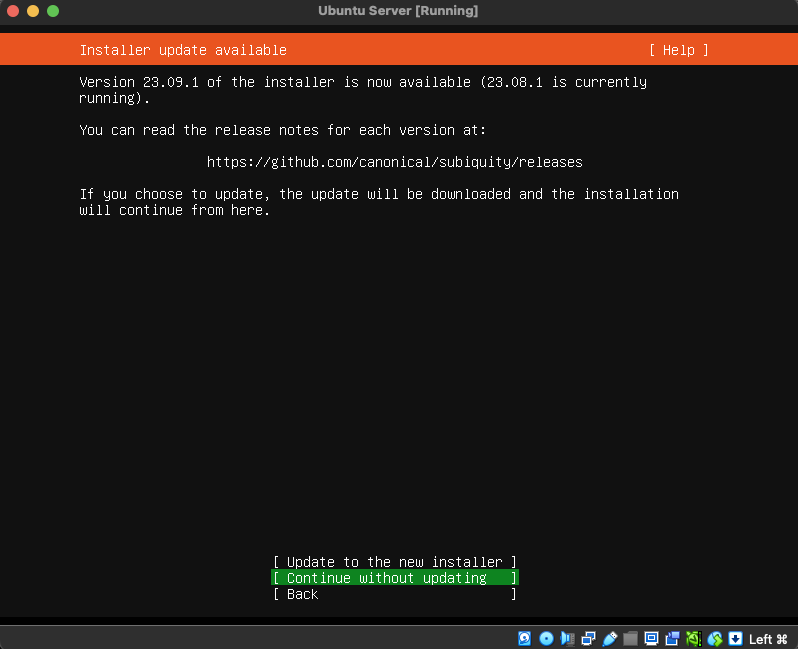
Second screen will ask if you want to update the installer, just go with "Update to the new installer" as shown below:
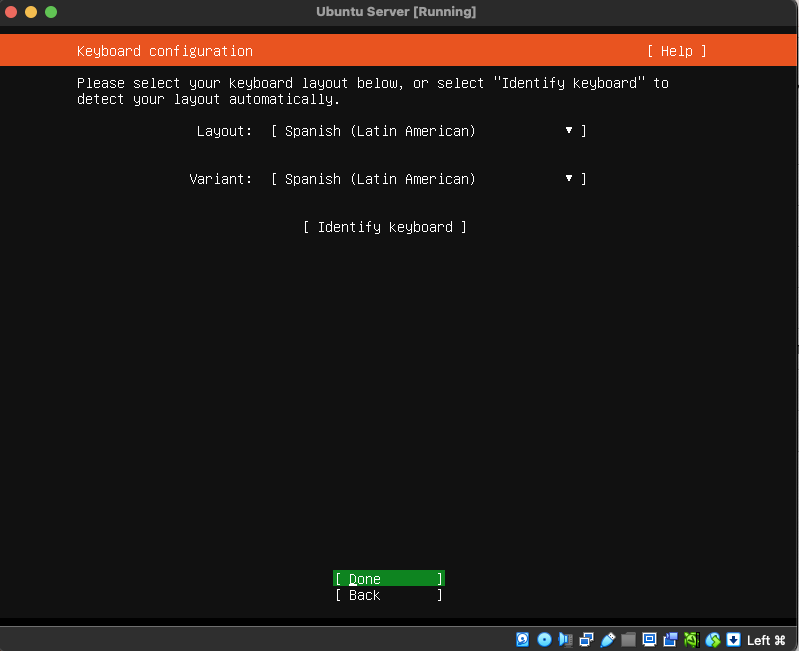
Keyboard configuration screen, choose as preferred, Hit Done:
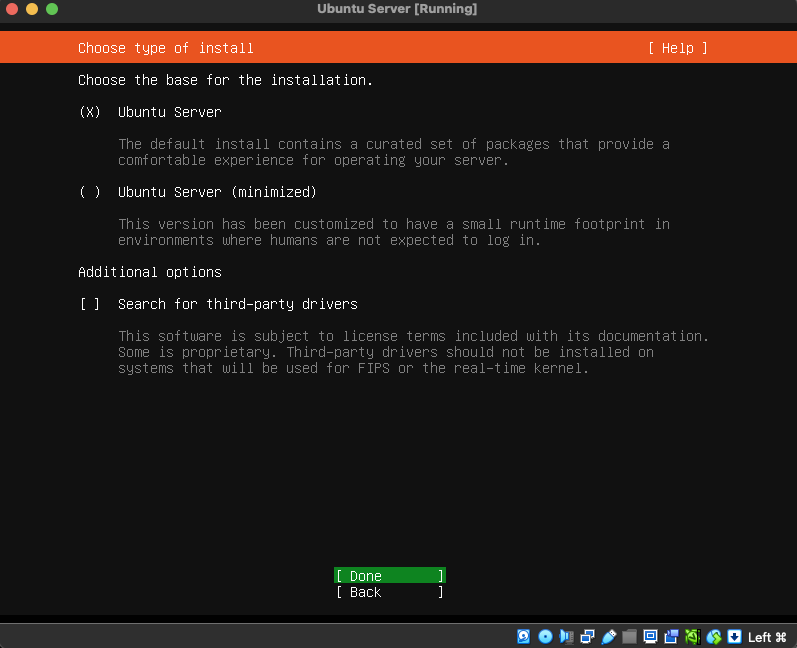
Type of installation screen, leave the default checked, Ubuntu Server, Hit Done:
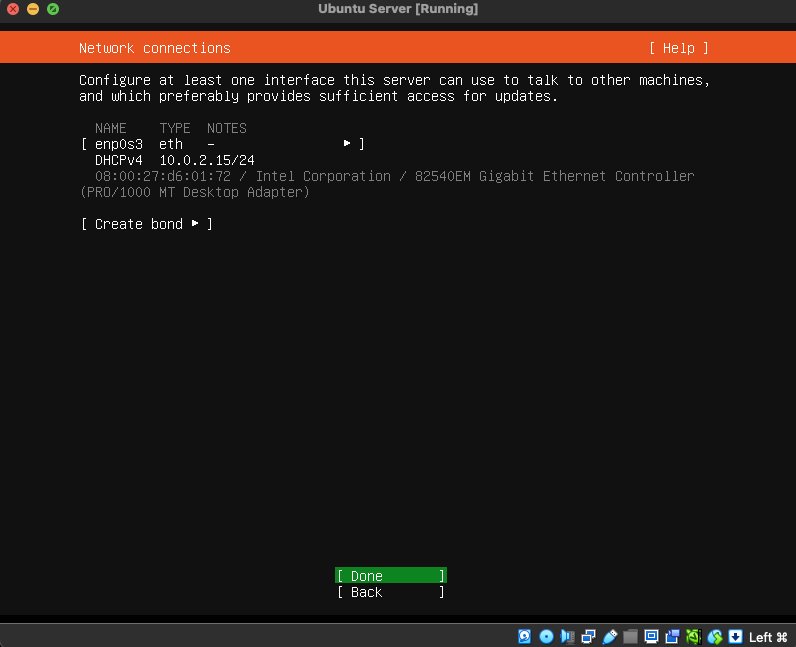
Network connections screen, leave the defaults, Hit Done:
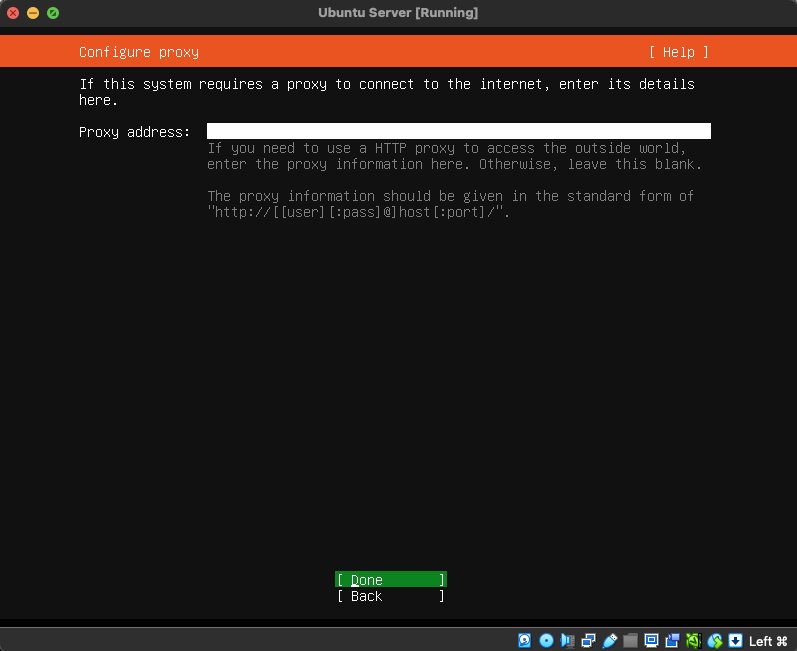
Proxy screen, leave empty, Hit Done:
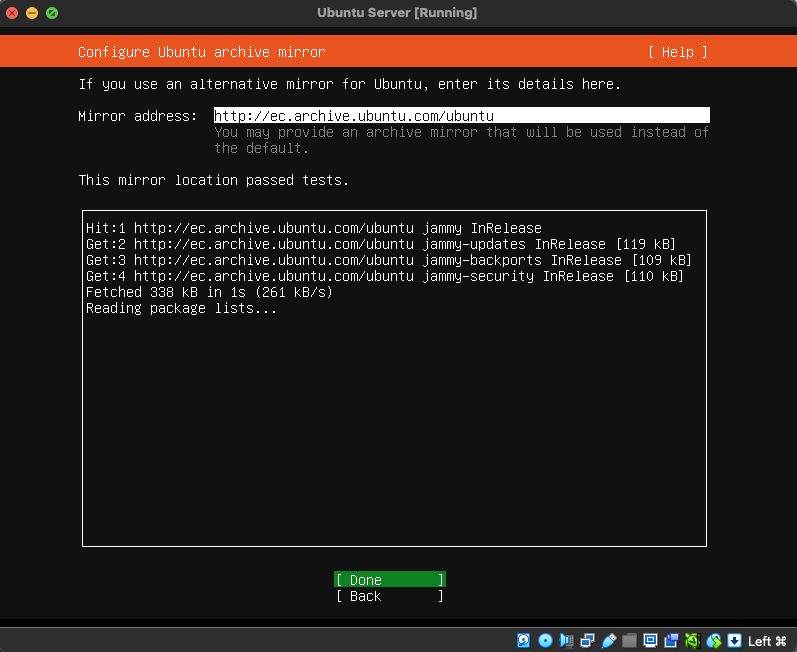
Mirror screen, use defaults, Hit Done:
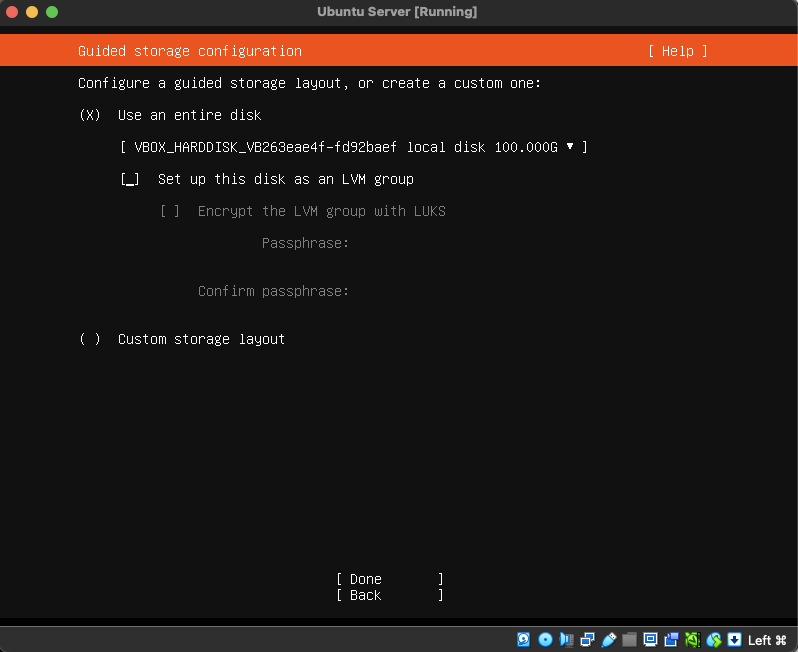
Guided storage Configuration screen, make sure to Uncheck the box "Set up this disk as an LVM group", Hit Done:
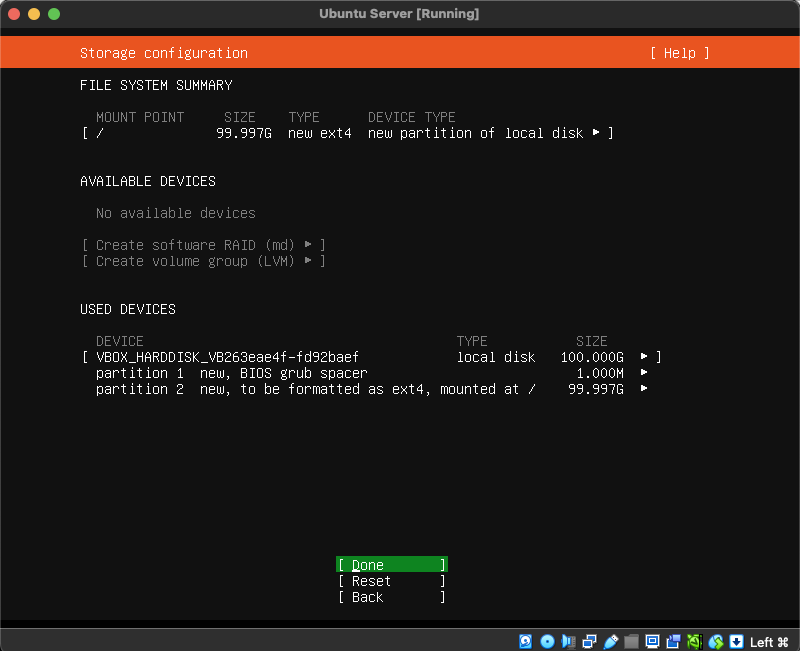
Storage configuration screen, go with defaults, Hit Done:
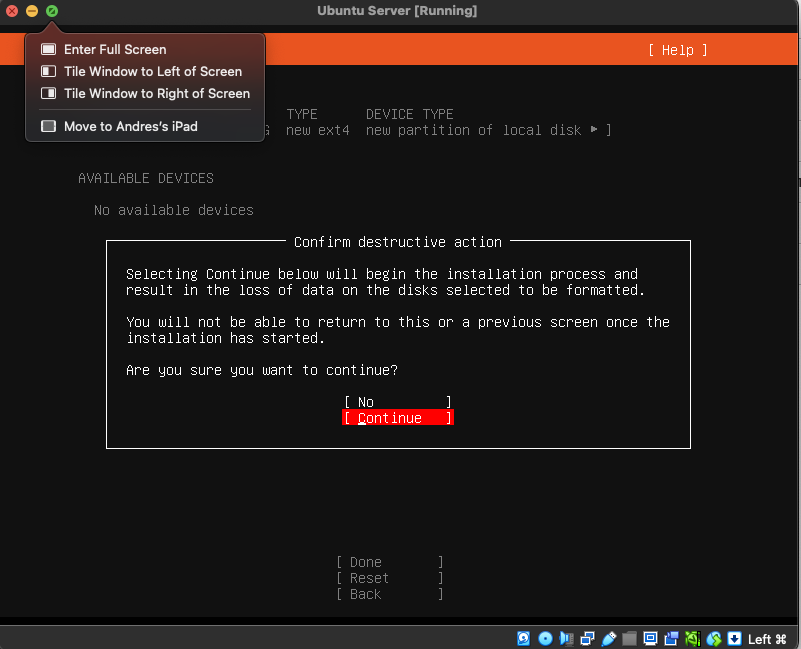
When prompted to "Complete Destructive Action", select Continue, then Hit Done:
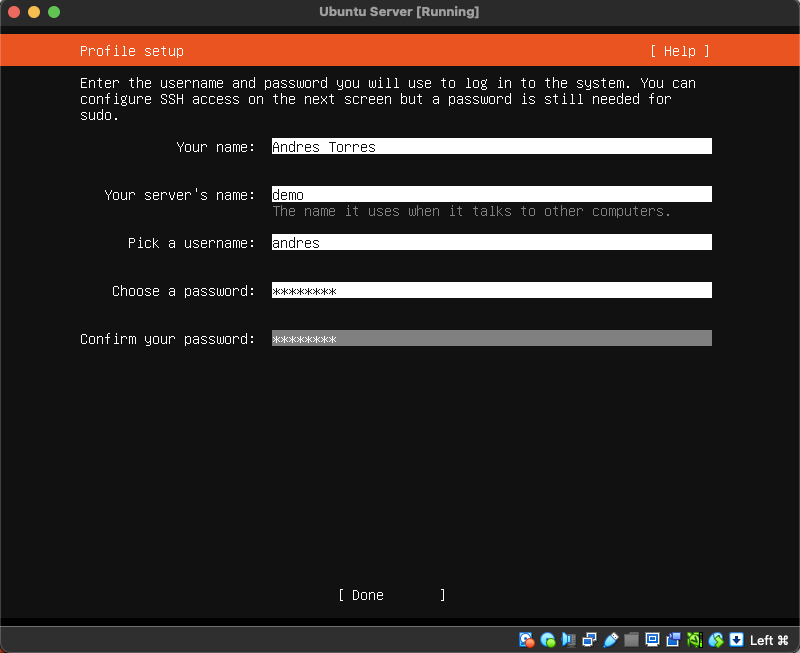
Profile Setup Screen, enter your credentials:
Your Name: Your complete name.
Your server's name: Give your server a cool name! (no white spaces are allowed).
Pick up a username: a user name of your preference, this username will be the first admin user with SUDO privileges, so keep that in mind.
Choose a password: Your password.
Confirm your password: Same value as above.
Once the values are filled in, Hit Done:
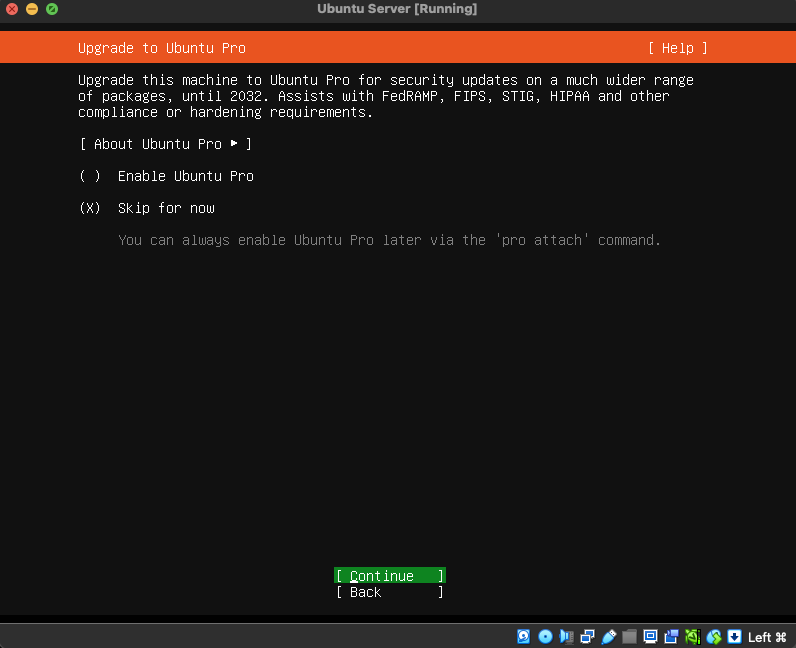
Enable Ubuntu Pro screen, leave defaults -> "Skip for now", Hit Done:
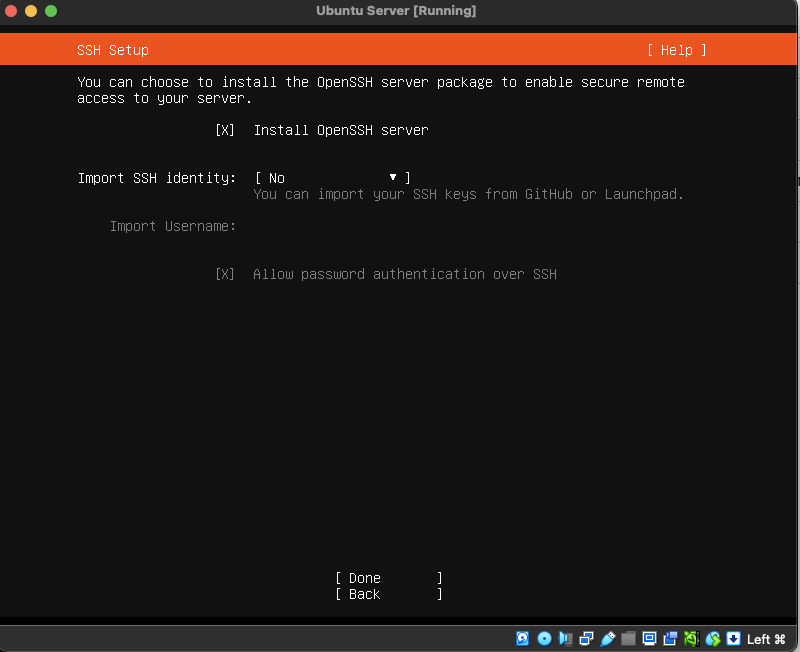
Install OpenSSH Server screen, ENABLE the option so you can SSH your server after it is installed, Hit Done:
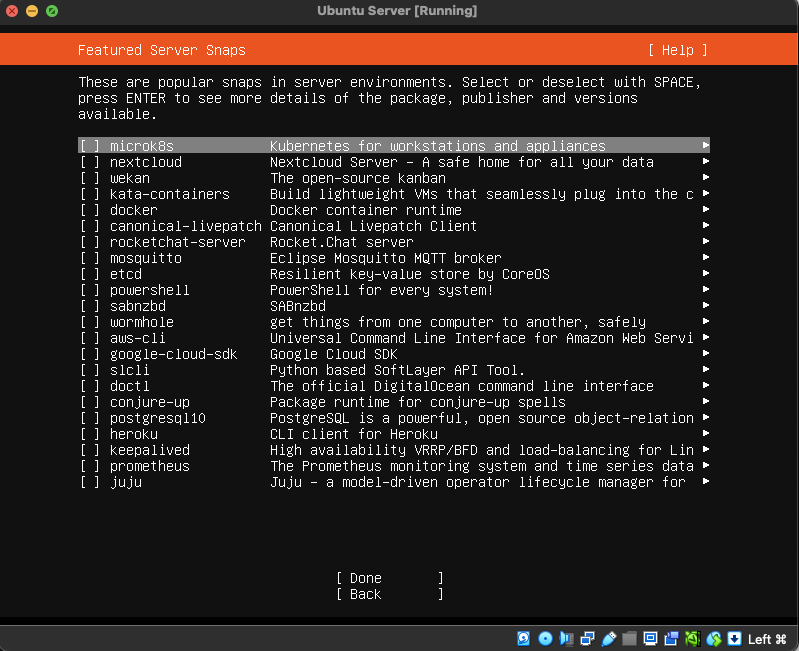
Feature Server Snaps screen, don't choose anything go with the defaults, Hit Done:
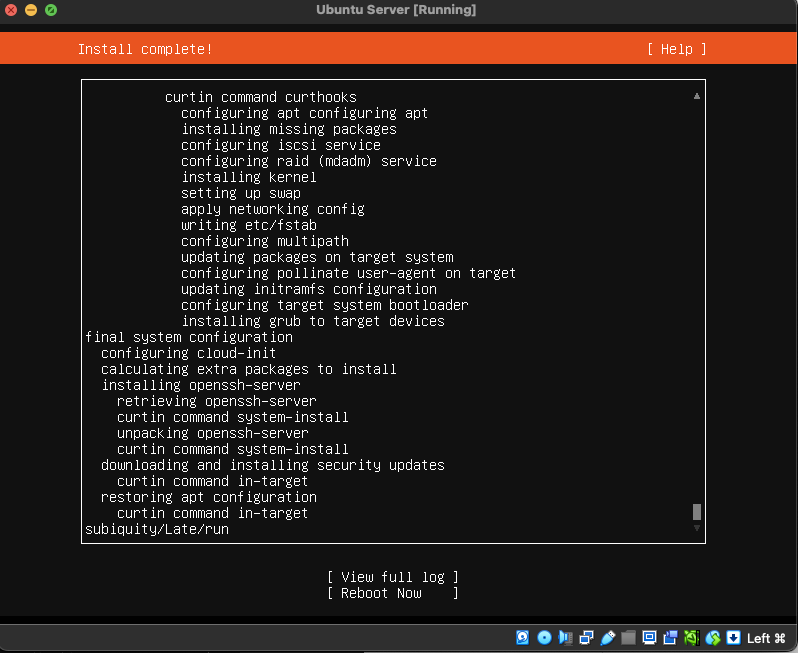
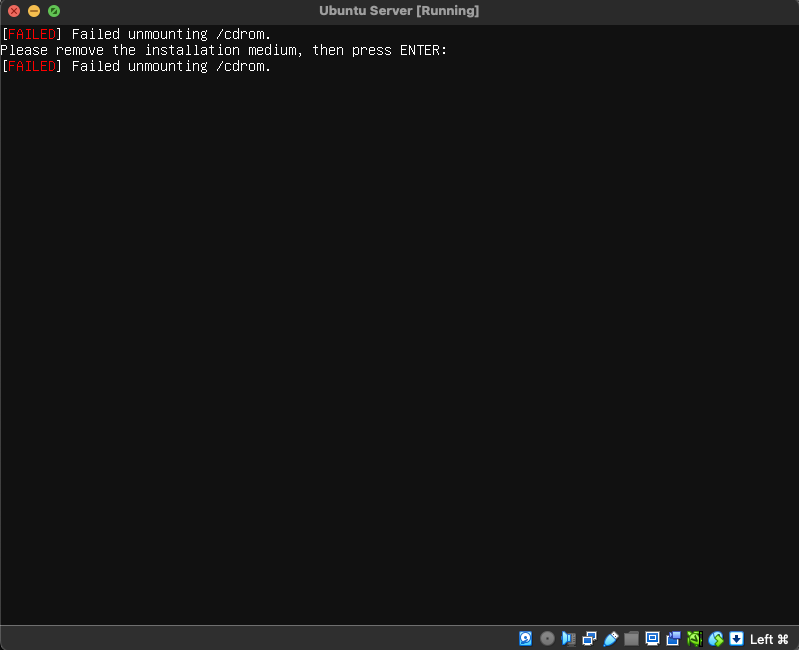
After this step, the installation will begin, Once the installation is complete you'll get and screenshot just like this, select Reboot Now:
If promoted to remove the installation Media, just hit the Enter key twice and the system will restart automatically, if for some reason it stills give you errors just go to you VirtualBox console, Under -> Settings of your Virtual Machine select the STORAGE Tab and just remove the attached .ISO file from the Controller IDE, mouse Right Click.
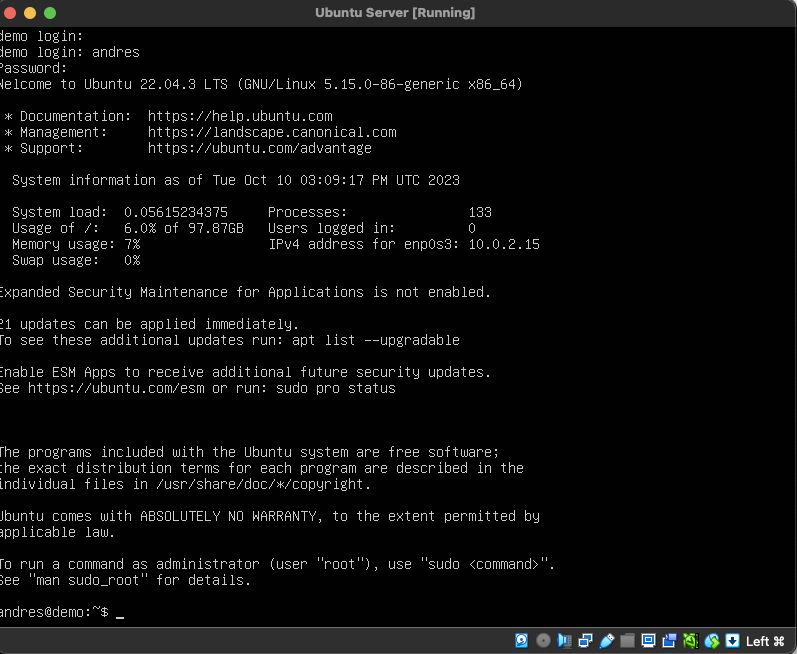
Once the restart process is done you can login to your new VM by adding you username and password:
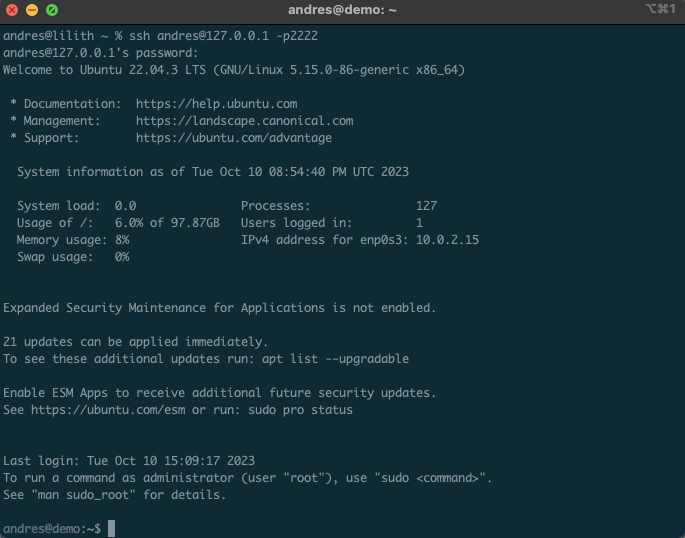
Now let's SSH to our newly created machine, you can use any terminal on Mac, Linux or Putty on Windows, now, just for simplicity leave the Virtual Machine running in the dock:
## Make sure you use your username instead of andres
$ ssh andres@127.0.0.1 -p2222
You'll get an output like the screenshot below:
Once logged in, let's update our newly created Ubuntu Server by running the following commands:
$ sudo apt update && sudo apt full-upgrade -yOnce that process is done reboot your Virtual Machine:
$ sudo rebootWait until the Virtual Machine boots up again, SSH back in as described before and now we can start with the LAMP configuration.
Note: Technically speaking under this scenario, you'll have to manually start/stop your Virtual Machine every time you want to access it or want to shutdown your computer, follow this guide in order to automate the process by having your Host OS boot or shutdown your VM every time you turn on or off your computer.
4.- configure lamp stack
In an past blog I wrote how to set up a LAMP stack for Drupal 8/9 but I'm going to be updating it here so it matches Drupal 9.5+ and Drupal 10/11.
This post is targeted for Apache HTTP Server only, which I think is the most robust Web Server for Drupal and any PHP apps but overall the best option to run PHP applications natively. If interested, I wrote a blog on how to run PHP apps on Nginx.
Let's start by getting the required Apache, MySQL Server, and some extra useful packages, run the following in your terminal:
$ sudo apt install apache2 libapache2-mod-fcgid mysql-server mysql-client memcached build-essential autoconf git unzip zip curl default-jre default-jdk dkms -yEnable necessary Apache modules:
$ sudo a2enmod alias rewrite proxy_fcgi setenvif expires headers remoteip ssl actionsThese are basic Apache modules required by Drupal or any other PHP app, alias for url aliasing, rewrite for url rewriting, proxy_fcgi is the Apache handler for php-fpm, expires for sessions, headers for requests manipulation, remoteip if you want to test your site behind a proxy, ssl to activate HTTPS support for your sites.
Reboot your Virtual Machine, for changes to take effect:
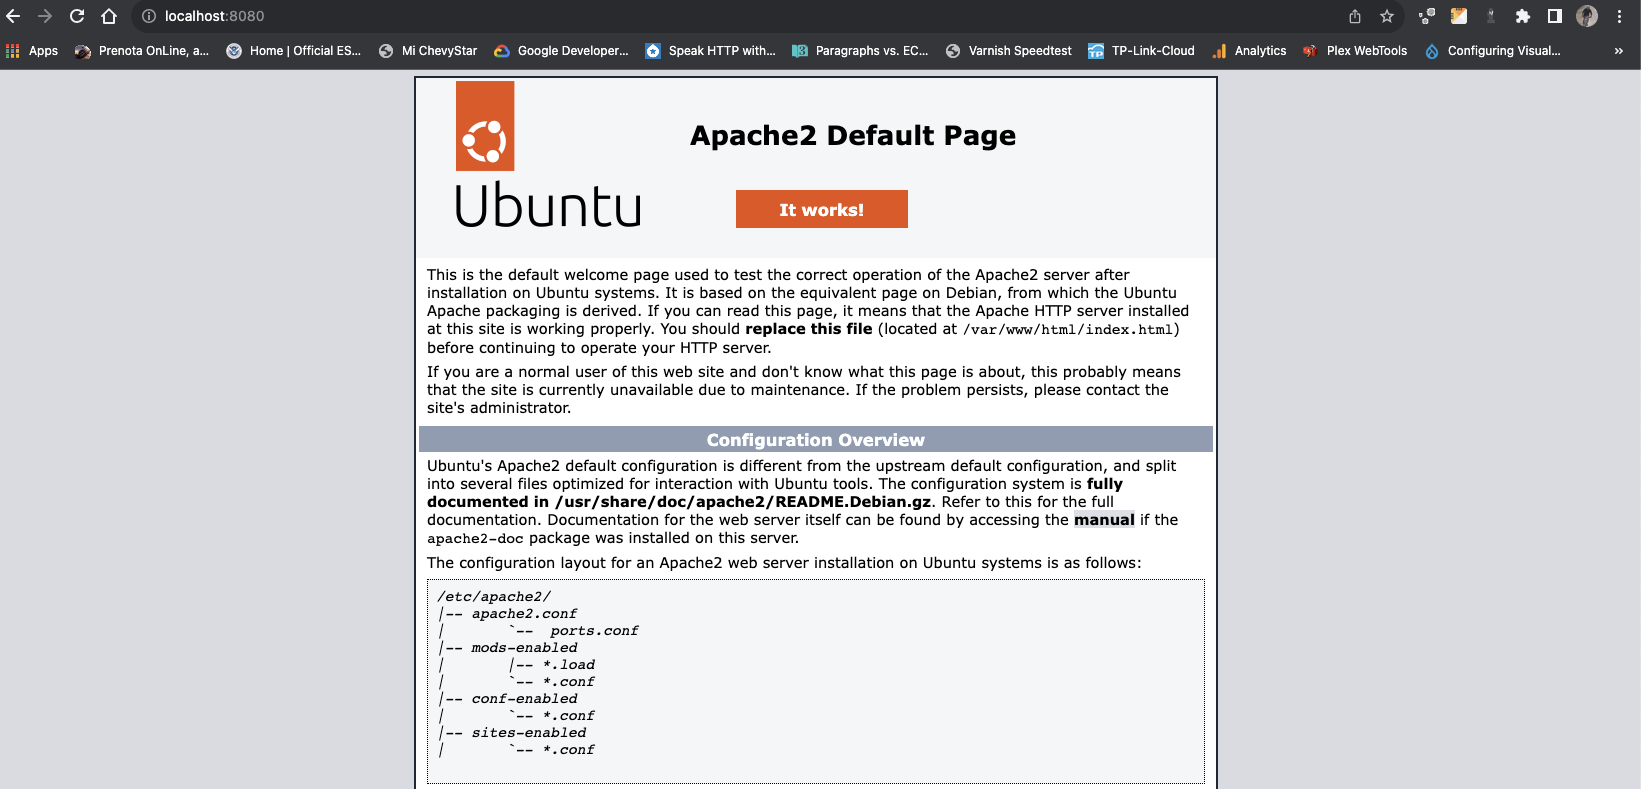
$ sudo rebootAfter restart, you can now see your Web Server responding or listening on port 8080 as we configured before on the VirtualBox NAT Section, open any browser and go to: http://localhost:8080
Now, let's install the required packages for PHP:
This approach will allow you to install different PHP versions so you can run pretty much any PHP/Drupal projects depending on the required PHP version required by that project. Since I'm focusing on Drupal 10 and 11, I'll show how to run PHP 8.2 and PHP 8.3.
First, we need to register a new repository that contains multiple PHP versions, more info about the repo can be found here, in a terminal, run:
$ sudo apt install software-properties-common -y
$ sudo add-apt-repository ppa:ondrej/php -y
$ sudo apt update && sudo apt full-upgrade -y
After adding the repository, let's install the PHP 8.2 packages required by Drupal:
$ sudo apt install php8.2 libapache2-mod-php8.2 php8.2-common php8.2-mysql php8.2-cli php8.2-opcache php8.2-readline php8.2-phpdbg php8.2-fpm php8.2-cgi libphp8.2-embed php8.2-xml php8.2-xmlrpc php8.2-curl php8.2-gd php8.2-dev php8.2-imap php8.2-mbstring php8.2-soap php8.2-zip php8.2-intl php8.2-ssh2 php8.2-xdebug php8.2-memcached php8.2-apcuAnd for PHP 8.3:
$ sudo apt install php8.3 libapache2-mod-php8.3 php8.3-common php8.3-mysql php8.3-cli php8.3-opcache php8.3-readline php8.3-phpdbg php8.3-fpm php8.3-cgi libphp8.3-embed php8.3-xml php8.3-xmlrpc php8.3-curl php8.3-gd php8.3-dev php8.3-imap php8.3-mbstring php8.3-soap php8.3-zip php8.3-intl php8.3-ssh2 php8.3-xdebug php8.3-memcached php8.3-apcuThe commands above will download and install all the essential PHP extensions in Ubuntu Server required by Drupal and any other PHP apps. These include PHP extensions for MySQL connections, debugging with X-Debug, Memcache and APC support, Image manipulation, compression, etc.
After running the above, PHP8.3 will be set as the default PHP version for the command line interface CLI, in order the check which PHP version is set as default and/or change it, run:
$ sudo update-alternatives --config phpRunning the above will let you choose the default version you want to run as the PHP CLI option, useful when enabling/disabling PHP extensions such as Xdebug or running Drush:
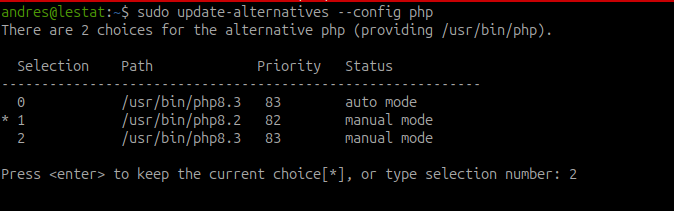
Select the option you prefer, for now I'm working with PHP 8.2 for my Drupal 10 sites and when running Drupal 11 sites, I just need to run the command above and select php8.3. See the PHP requirements for Drupal here.
Once you are done with the steps above, reboot your Virtual Machine:
$ sudo rebootAfter reboot, SSH back in your VM and enable both PHP 8.2 and PHP 8.3 fpm and make them available for Apache:
$ sudo a2enconf php8.2-fpm php8.3-fpmOnce enabled, restart the Apache service:
$ sudo systemctl restart apache2.serviceDone! you have configured Apache to use php8.2-fpm and php8.3-fpm to run you PHP applications, but there is still one more step, it is recommended that on every site, meaning every virtual host you create you need to always add the following directive depending on the PHP version you'll be running your project on, i.e for PHP 8.2:
  <FilesMatch \.php>
    SetHandler "proxy:unix:/var/run/php/php8.2-fpm.sock|fcgi://localhost/"
  </FilesMatch>
For PHP 8.3:
  <FilesMatch \.php>
    SetHandler "proxy:unix:/var/run/php/php8.3-fpm.sock|fcgi://localhost/"
  </FilesMatch>
In order to test, let's add one of the above (PHP 8.2) to the default Virtual host:
$ sudo nano /etc/apache2/sites-available/000-default.confFile should look like this:
<VirtualHost *:80>
  # The ServerName directive sets the request scheme, hostname and port that
  # the server uses to identify itself. This is used when creating
  # redirection URLs. In the context of virtual hosts, the ServerName
  # specifies what hostname must appear in the request's Host: header to
  # match this virtual host. For the default virtual host (this file) this
  # value is not decisive as it is used as a last resort host regardless.
  # However, you must set it for any further virtual host explicitly.
  #ServerName www.example.com
  ServerAdmin webmaster@localhost
  DocumentRoot /var/www/html
  # Available loglevels: trace8, ..., trace1, debug, info, notice, warn,
  # error, crit, alert, emerg.
  # It is also possible to configure the loglevel for particular
  # modules, e.g.
  #LogLevel info ssl:warn
  ErrorLog ${APACHE_LOG_DIR}/error.log
  CustomLog ${APACHE_LOG_DIR}/access.log combined
  # For most configuration files from conf-available/, which are
  # enabled or disabled at a global level, it is possible to
  # include a line for only one particular virtual host. For example the
  # following line enables the CGI configuration for this host only
  # after it has been globally disabled with "a2disconf".
  #Include conf-available/serve-cgi-bin.conf

  # Enable php-fpm 8.2 support for this host:
  <FilesMatch \.php>
    SetHandler "proxy:unix:/var/run/php/php8.2-fpm.sock|fcgi://localhost/"
  </FilesMatch>
</VirtualHost>
Save and Exit. Restart Apache so changes can take place:
$ sudo systemctl restart apache2.serviceAnd there we go! We have configured Apache and PHP using php-fpm which is considered to perform faster on big or small environments.
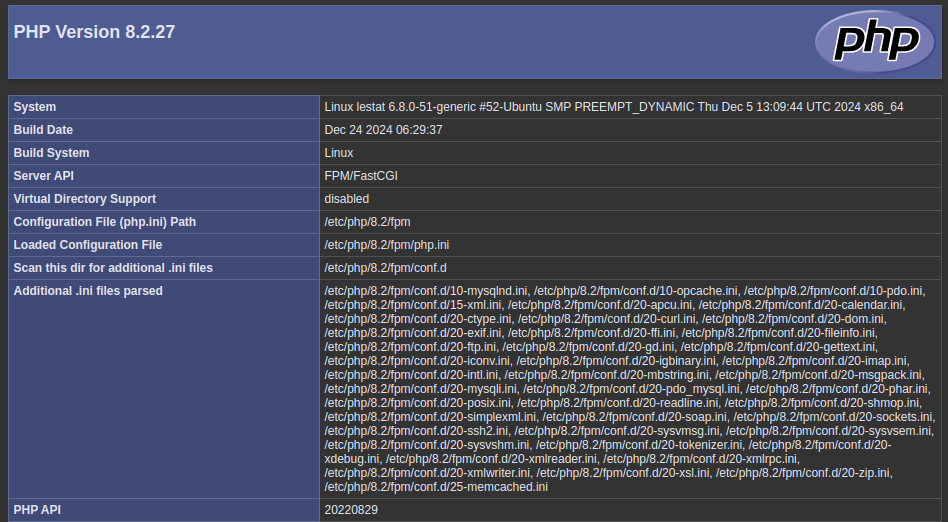
In order to test, create a simple PHP file on the default Apache www/ folder where the default virtual host points to:
$ sudo nano /var/www/html/index.phpand paste the following PHP code:
<?php
  echo phpinfo();
?>
Save the file and open up a browser window and go to: http://localhost:8080/index.php and you should see an output similar as the next screenshot:
Now let's tune up PHP 8.2 & 8.3 for development purposes, open up the php.ini file and edit the following values for each PHP version you are running, i.e:
## PHP 8.2 php-ini
$ sudo nano /etc/php/8.2/fpm/php.ini

## PHP 8.3 php-ini
$ sudo nano /etc/php/8.3/fpm/php.ini
Look for the following directives and update, you could also copy/paste the following block at the end of the php.ini file:
# max_execution_time: Set it to 60. Depending on your project this value can be increased.
max_execution_time = 60

# max_input_vars: Uncomment and set it to at least 3000.
max_input_vars = 10000

# memory_limit: Set it to 256M for starters, depending on your project you can increase this value.
memory_limit = 256M

# error_reporting: Set it to E_ALL - on dev we want all errors to be shown.
error_reporting = E_ALL

# display_errors: Set it to On
display_errors = On

# display_startup_errors: Set it to On
display_startup_errors = On

# post_max_size: Set it to 512M or whatever value suits your project.
post_max_size = 512M

# upload_max_filesize: Set it to 512M or whatever value suits your project.
upload_max_filesize = 512M

# wsdl_cache_enabled: Set it to 0 on development we don't want to cache soap calls.
soap.wsdl_cache_enabled = 1

## apc.shm_size: Apcu Memory - Default is 32MB, I recommend 64MB for big projects.
apc.shm_size = 64M
Save the file and restart the service:
## Restart php8.2-fpm service
$ sudo systemctl restart php8.2-fpm.service

## Restart php8.3-fpm service
$ sudo systemctl restart php8.3-fpm.service
Alright, we are finished setting up our Virtual Machine so let's prepare the steps to store and manage our Drupal projects. I usually prefer to store my projects on a folder under my HOME/ folder in order to avoid file permissions issues and/or have to deal with sudo commands. Follow the next steps to keep your installations as neat as possible:
## Move to your HOME/ folder.
$ cd ~/

## Let's add the www-data user to your USER group.
$ sudo adduser www-data YOUR_GROUP ## i.e www-data andres, normally you user-name and group are named the same.

## Create a new folder to hold your projects.
$ mkdir www/
IMPORTANT: Use the following commands every time you add a new project or if you ever find file permissions issues, like access denied errors, in order to keep your file permissions and ownership clean:
## New projects added or for troubleshooting:

## 1) Change www/ and subfolders access permissions:
$ sudo chmod -R 0777 www/

## 2) Change www/ and subfolders ownership to your user and the Apache group:
$ sudo chown -R YOUR_USERNAME:www-data www/ ## i.e andres:www-data (user:www-data)
Additional/Optional File Tuning: the following block shows some php-fpm/apache tune up for big projects mostly to avoid time outs and 500/504 errors so, depending on the size of the application you'll be running you could edit and test these values. The default values after a normal installation are relatively Ok in order to handle mid-size PHP apps.
## Apache 2 ##

## FcgidConnectTimeout: Default is 20. Try increasing to 300.
## FcgidIOTimeout specifies the maximum time (in seconds) Apache will wait for input/output from
## the FastCGI application before timing out and potentially terminating the process.

$ sudo nano /etc/apache2/mods-enabled/fcgid.conf

## Edit the following directive:
<IfModule mod_fcgid.c>
   # Other Fcgid directives here
   FcgidIOTimeout 300
</IfModule>
## Note: the above can also be added at a VirtualHost level.

## PHP 8.1, 8.2, 8.3 ##

## request_terminate_timeout: This option should be used when the 'max_execution_time' ini option
## does not stop script execution for some reason.
## Replace "8.2" with the mod you are using for your site.

$ sudo nano /etc/php/8.2/fpm/pool.d/www.conf

## Uncomment the line and set it to 300s
request_terminate_timeout = 300s

## pm.max_children: Default is 5.
## Increase the value as neeeded.
## Uncomment the line and set it to 50
pm.max_children = 50
Reboot your VM for changes to take effect:
$ sudo rebootWatch for PHP and Apache Logs: These commands are very useful to get information on the Apache and php-fpm logs.
## Paste this command into your terminal to see the Apache logs for your VHost:

## Error log.
$ tail -f /var/log/apache2/MY_SITE_NAME-error.log

# Access log.
$ tail -f /var/log/apache2/MY_SITE_NAME-access.log

## Paste this command into your terminal to see the PHP-FPM logs.
## Replace "php8.2" with the mod you are using for your site.
$ sudo tail -f /var/log/php8.2-fpm.log
Last but not least, let's talk about PHP Xdebug. Xdebug is a PHP extension that helps developers debug and smoothen the development of their projects to watch for errors and resolve them. It upgrades PHP’s var_dump() function and adds stack traces for notices, warnings, errors, and exceptions.
We just talked about how to enable or disable PHP extensions based on our PHP version (8.2, 8.3, etc.) by switching the PHP alternatives for the CLI so, since we chose PHP8.2 for this post, I'll show you how to enable disable Xdebug extension and configure it, the instructions below will apply to any other PHP version you installed using this guide but make sure you are running the correct PHP alternative for your project, this is important!
## Enable xdebug for php8.2
$ sudo phpenmod xdebug

## Disable xdebug for php8.2
$ sudo phpdismod xdebug

## Restart the php/apache services
$ sudo systemctl restart apache2.service && sudo systemctl restart php8.2-fpm.service && sudo systemctl restart php8.3-fpm.service
Alright, now that we have enabled Xdebug, let's add some config directives so it can run properly for remote debugging and also integrate it with VS Code using the approach described in this post.
We are going to edit the xdebug.ini file that gets created/activated once the extension is enabled, do this for any of the PHP alternatives you are running, we are still using PHP8.2 for this demo.
## Edit the xdebug.ini file
$ sudo nano /etc/php/8.2/fpm/conf.d/20-xdebug.ini
## Add this directives at the end of the file.
## @see https://xdebug.org/docs/upgrade_guide
xdebug.mode=debug
xdebug.start_with_request=yes
xdebug.client_host=127.0.0.1
xdebug.client_port=9003
xdebug.remote_enable = 1
xdebug.remote_autostart = 1
## Uncomment the following if you want to enable profiler.
#xdebug.profiler_enable_trigger = 1
#xdebug.profiler_enable = 1
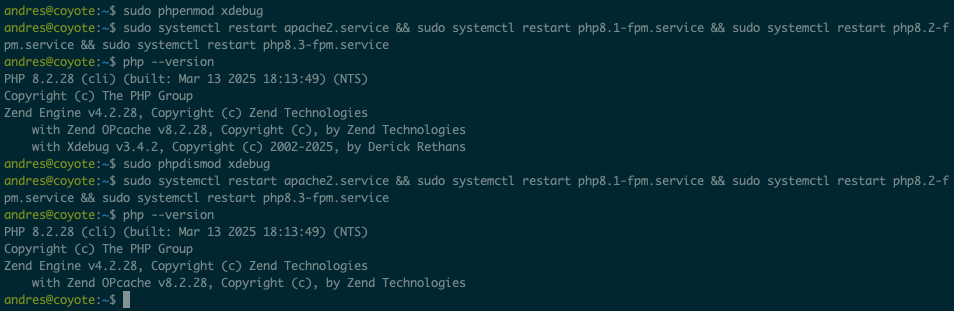
#xdebug.profiler_output_dir = "/tmp"And finally, restart the services:
## Restart the php/apache services
$ sudo systemctl restart apache2.service && sudo systemctl restart php8.2-fpm.service && sudo systemctl restart php8.3-fpm.service
You can check for the status (disabled/enabled) of Xdebug for the PHP alternative you are running by typing in your command line php --version, the outputs should look similar to the next screenshot:
5.- Mysql server
We are almost there! Let's move with the MySQL database, creating a database on MySQL on Ubuntu 22.04/24.04 it's pretty straight forward for development environments, in order to create our first database on our new LAMP Stack, we need to also create a user for the first time and then you just can reuse that user for new databases for other projects. Follow this quick steps in order to login to MySQL as the root user, create a database user, create a database and grant permission to that user over the databases.
Note: Except for the "CREATE USER" command, you'll have to run these steps per project basis:
## Login to MySQL as root
$ sudo mysql

## Once logged in into the MySQL Server console, run:
## Create a new User for all your projects.
CREATE USER drupal@'localhost' IDENTIFIED BY "Drupal#123";

## Create a new database, replace drupal10 with a desired database name:
CREATE DATABASE drupal10;

## Grant all permissions to the new user to a database, replace drupal10 with the desired database name
GRANT ALL ON drupal10.* to drupal@'localhost';

## Grant process to user
GRANT PROCESS ON *.* to drupal@'localhost';

## If no errors are thrown, just exit the console: by typing:
exit;
Pretty simple, right? in order to test your new user credentials, from your command line run:
$ mysql -u drupal -p"Drupal#123"If all went Ok, you will get access to MySQL and see all the databases your user has permissions to access as shown in the next screenshot:
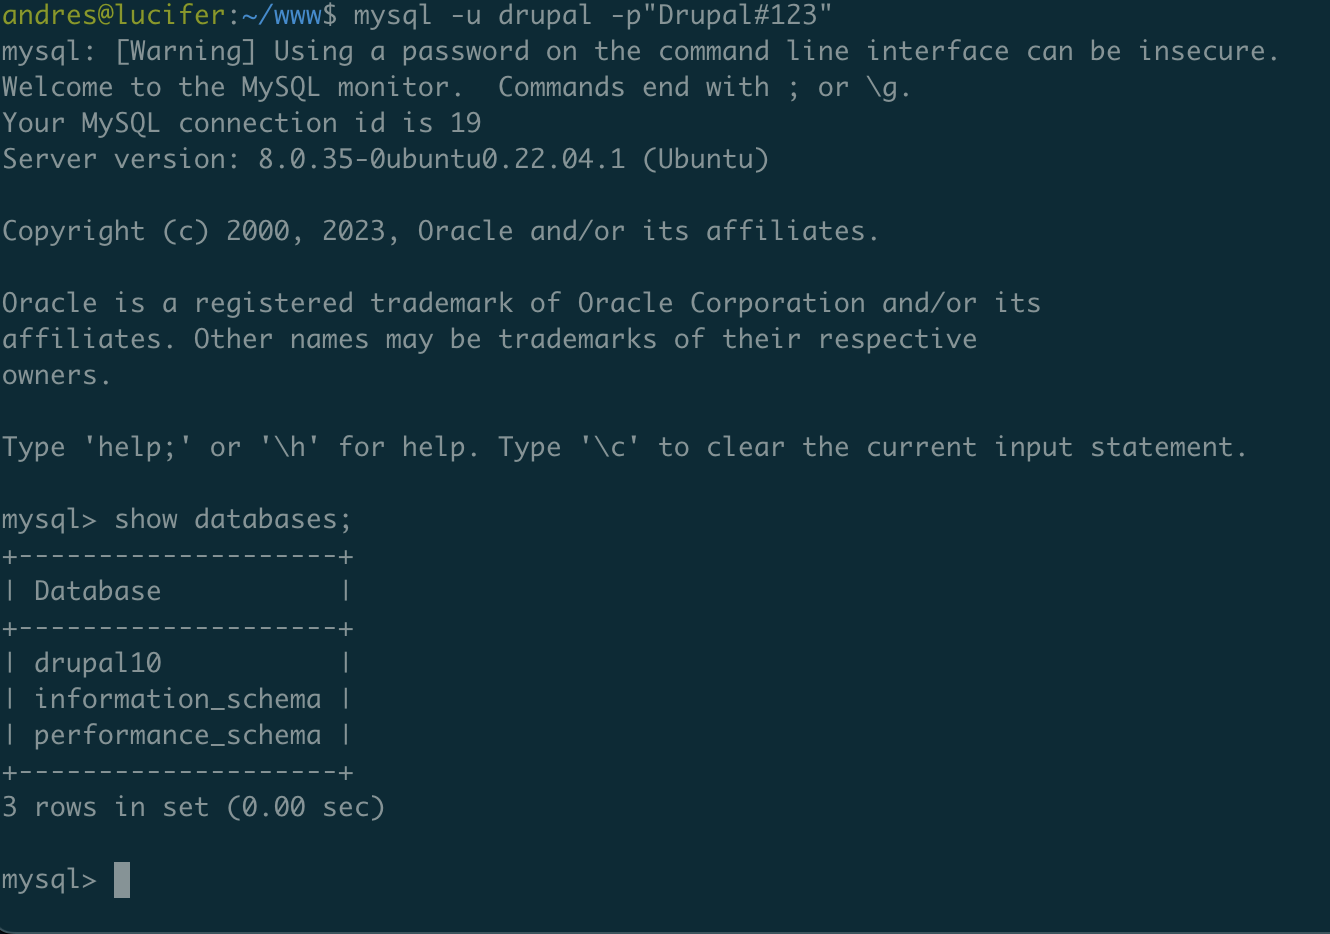
Type exit; on the MySQL console.
Since we are setting up our local development environment we need to consider that sometimes we will be working with big database dumps that need to be imported, so a little tune up for MySQL is necessary, let's increase the max_allowed_packet value:
## Edit the following file
$ sudo nano /etc/mysql/conf.d/mysqldump.conf

## Set max_allowed_packed value to at least 64M
max_allowed_packet     = 64M
Restart the MySQL service:
$ sudo systemctl restart mysql.serviceAnd that is all with MySQL.
6.- Drupal
Now that we have Apache, PHP, MySQL configured and our storage folder set up, let's continue with the default tools required by Drupal. First we need to install Composer, the package manager that allows to handle multiple tasks and install Drupal necessary libraries, I recommend to install Composer globally on Ubuntu for easy handling, follow the next steps to have Composer running:
# Download Composer from https://getcomposer.org/download/
# Choose the version you prefer based on your Drupal installations.
# You can have multiple Composer version running.
# In our case we will installing the latest Composer 2 version available as of the publication of this post.

## Move to your HOME/ folder.
$ cd ~/

## Grab the desired Composer version.
$ wget https://getcomposer.org/download/2.6.6/composer.phar

## Give Composer executable permissions.
$ chmod +x composer.phar

## Move Composer executable to your system bin folder to make it globally available.
$ sudo mv composer.phar /usr/local/bin/composer
To test Composer just run in your terminal the following command:
$ composer --versionand you should see the following output:

NOTE: You can switch to other Composer versions by following the steps above, just need to change the executable name when moving it to the system bin/ folder, for example you can download any Compose 1 version if needed and just replace mv composer.phar /user/local/bin/composer1 and run it as composer1 --version. Same works when you want to update to newer versions.
Sweet! We are now ready to create our first Drupal installation! First let's download Drupal with Composer, configure the Apache Virtual Host definition and then configure a database on MySQL.
Download Drupal using Composer. The recommended way is pretty well documented on the Drupal.org site you can find the whole documentation on this link if you need to dig deeper on other methods of installation. I'm providing the steps for a Drupal recommended project:
## Move to your HOME/www folder we created.
$ cd ~/www

## Run the following command to get all the files required. Composer will automatically run composer install too so all the
## dependencies required will be downloaded as well. Replace "my_site_name" with a name of your liking, this will create a
## new folder with that name under the www/ folder.
$ composer create-project drupal/recommended-project my_site_name
Ok, we have downloaded Drupal on our www/ folder container, let's move with the Apache VirtualHost configuration:
## Create a new file definition for your VirtualHost:
#
## Replace drupal10.antrecu.com.conf with a name that identifies your project. Don't forget to add the ".conf" at the end ## of the file
$ sudo nano /etc/apache2/sites-available/drupal10.antrecu.com.conf
Paste the following VirtualHost definition and replace/update accordingly:
## Paste the following and replace values as necessary, by default Composer will wrap the bootstrap files into the web/
## folder, so it's mandatory to point the DocumentRoot to to that folder same with Directory.
<VirtualHost *:80>
  DocumentRoot /home/YOUR_USER_NAME/www/drupal10/web
  ServerName drupal10.antrecu.com

  ## Uncomment if you want to register an Env variable per vhost,
  ## useful if need to run scripts per environment like Config split in Drupal.
  #SetEnv ENVIRONMENT prod_env

  ## Uncomment if behind a proxy that handles SSL already like Pound/Nginx:
  #SetEnvIf X-Forwarded-Proto https HTTPS=on

  <Directory /home/YOUR_USER_NAME/www/drupal10/web>
    Options Indexes MultiViews FollowSymLinks
    AllowOverride All
    Order allow,deny
    Allow from all
    Require all granted
  </Directory>

  ## Choose your PHP FPM Handler based on your project requirements, leave only one enabled!
  <FilesMatch \.php>
  	## PHP 8.2 - Uncomment/Comment out
  	SetHandler "proxy:unix:/var/run/php/php8.2-fpm.sock|fcgi://localhost/"
  	## PHP 8.3 - Uncomment/Comment out
   	#SetHandler "proxy:unix:/var/run/php/php8.3-fpm.sock|fcgi://localhost/"
  </FilesMatch>

  ## Uncomment the following if you want to protect your site with .htaccess
  ## Make sure to properly configure the .httpasswd
  #<Directory /home/YOUR_USER_NAME/www/drupal10/www>
  #   ## Protect Directory
  #  AuthType Basic
  #  AuthName "Restricted Content"
  #  AuthUserFile /etc/apache2/.htpasswd
  #  Require valid-user
  #</Directory>

  ## Error Logs.
  ## Replace drupal10.antrecu.com with the name of your project for easy identify logs.
  ErrorLog /var/log/apache2/drupal10.antrecu.com-error.log
  CustomLog /var/log/apache2/drupal10.antrecu.com-access.log combined
</VirtualHost>
Once the file it's saved, we need to enable the site and restart the Apache2 service:
## Enable a site VirtualHost
#
## Replace drupal10.antrecu.com.conf with the name of your project .conf
$ sudo a2ensite drupal10.antrecu.com.conf

## Restart the Apache2 service on Ubuntu
$ sudo systemctl restart apache2.service
Now, for local development we need to tell our HOST machine where to point the URL so we can access the site using a Web Browser, to do so we need to edit the hosts file of our operative system and add a new entry for our project ServerName we provided on our VirtualHost definition, on Mac and Ubuntu the file is located in /etc/hosts on Windows is located in C:\Windows\System32\drivers\etc folder.
## Edit hosts file on Mac or Linux
$ sudo nano /etc/hosts
Once the file opens for editing follow this quick guide:
## Here the sample of a hosts file, you can add entries based on how many projects you are going to run locally.
## Lines added by system:

127.0.0.1 localhost
127.0.1.1 lucifer
## End lines added by system
#

## Here you can manage all your targets.
## For VirtualBox Virtual Machines or native development. Replace drupal10.antrecu.com with the ServerName provided on
## your Apache2 VirtualHost definition.
127.0.0.1 drupal10.antrecu.com

##
## For external development on other machines meaning different IP addresses. Replace REMOTE_MACHINE_IP with the
## current IP your are pointing to, i.e 192.168.60.45
REMOTE_MACHINE_IP drupal10.antrecu.com
#
## End targets
#

## Lines added by system:
# The following lines are desirable for IPv6 capable hosts
::1     ip6-localhost ip6-loopback
fe00::0 ip6-localnet
ff00::0 ip6-mcastprefix
ff02::1 ip6-allnodes
ff02::2 ip6-allrouters
## End lines added by system
Save and Exit.
Before installing, create a settings.php file for your Drupal site based on the default.settings.php template available under web/sites/default:
## Create settings.php
## Move to your sites/default directory of your project
$cd ~/www/drupal10/web/sites/default
## Copy the default and create the settings file
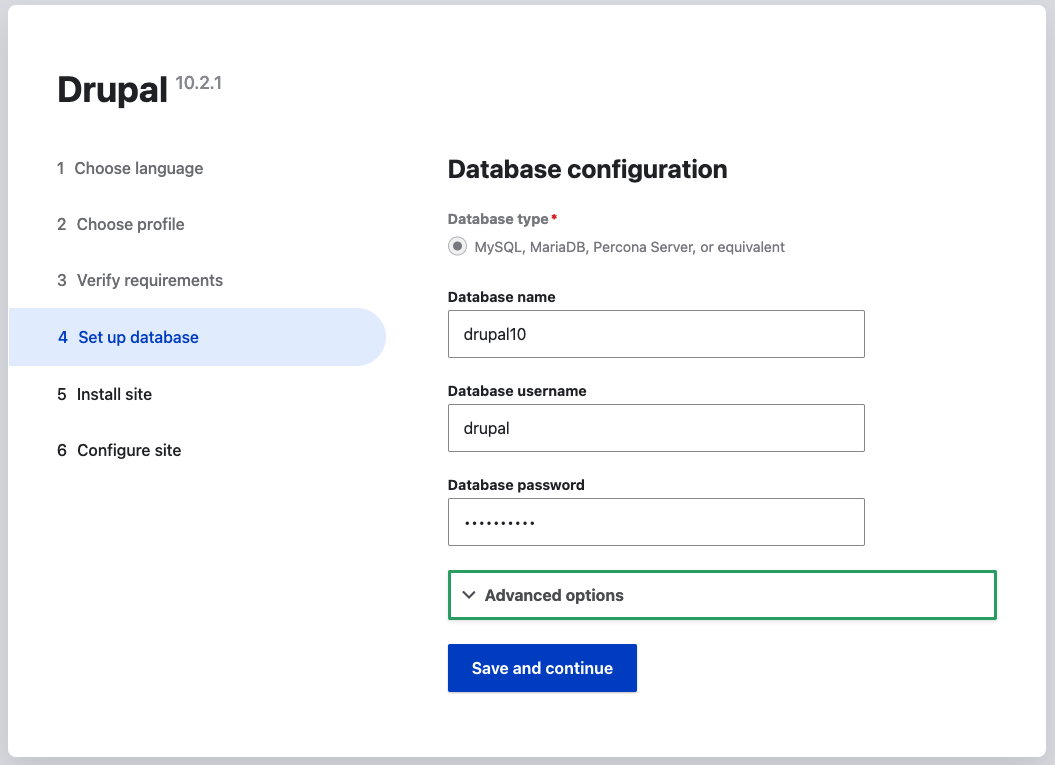
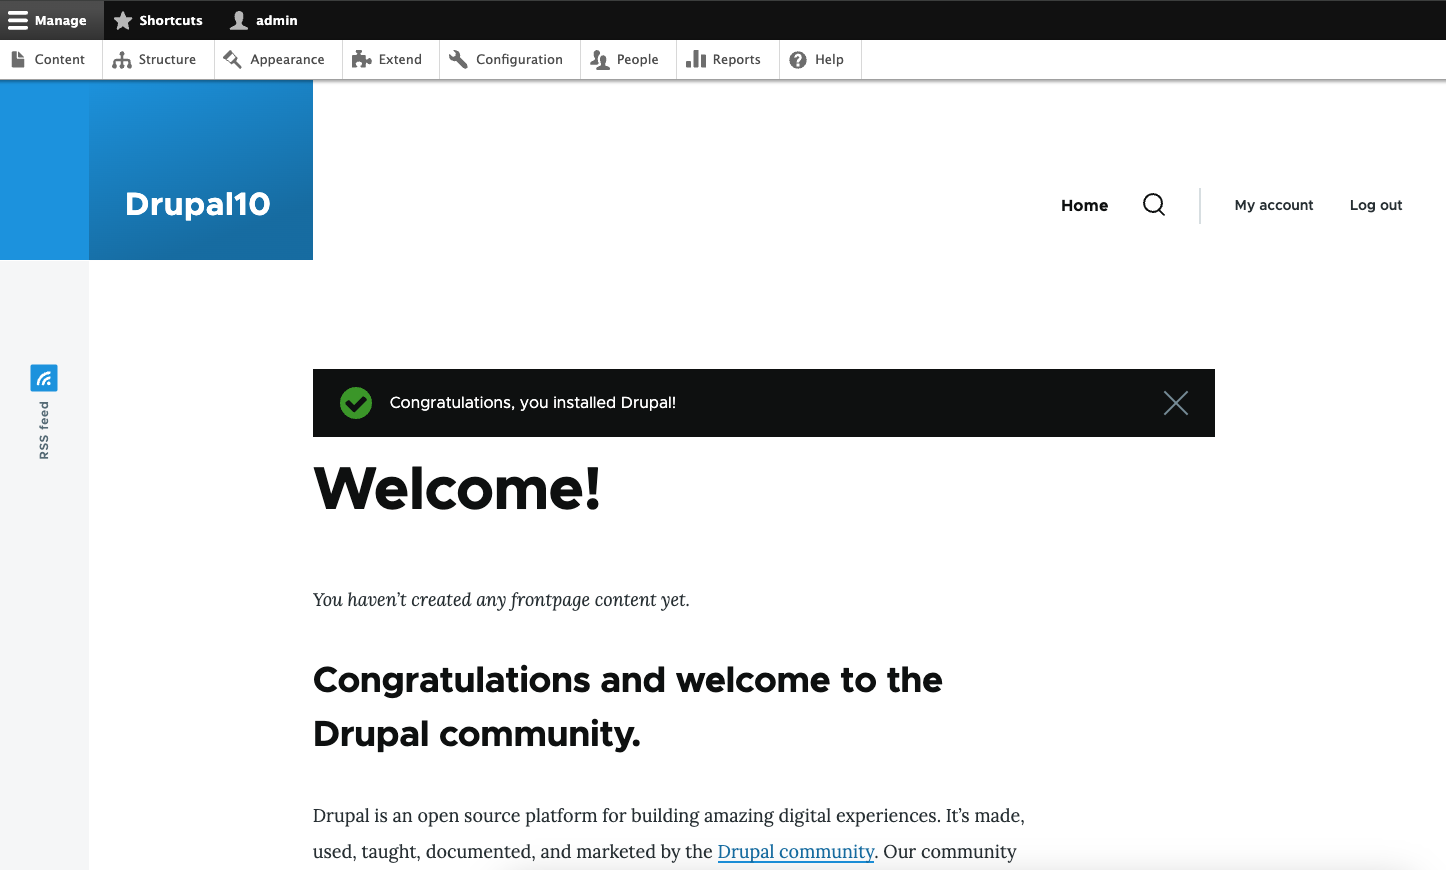
$ cp default.settings.php settings.phpNow we can proceed with the Drupal installation process through your web browser by accessing the URL provided in your VirtualHost (don't forget to add the URL to your /etc/hosts file too!) i.e http://drupal10.antrecu.com:8080 for your Virtual Machine. Follow the wizard as usual, provide the credentials for the MySQL database you previously created and Drupal installer will do the settings.php file updates automatically.
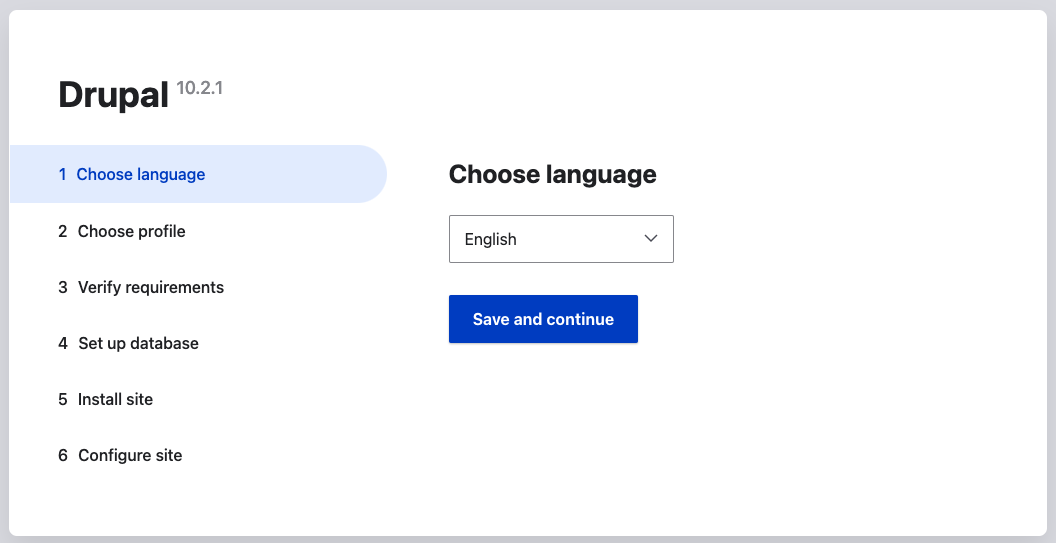
After the installation process is done you'll be redirected to the homepage of your new site.
Perfect! so far so good, now it is Drush time! Drupal 10+ requires Drush 12+ and since Drupal 9 it is mandatory that Drush is installed as a Composer dependency on a per project basis.
NOTE: As per the documentation on Drush execution, you MUST run Drush from the document root of your project! More info here:
Install Drush, on a terminal run:
## Move to your Home and project folder document root.
$ cd ~/www/drupal10

## Install Drush using Composer:
$ composer require drush/drush

## Make drush executable:
$ chmod +x ./vendor/bin/drush
Save and Exit.
Make Drush available as the drush command for easy handling instead of typing ./vendor/bin/drush every time you want to run it:
# Move to your HOME folder:
$ cd ~/

## Edit your .bashrc file in order to add Drush executable for all your projects.
$ nano ./bashrc

## Copy & paste the following line at the end of the .bashrc file:
export PATH="$PATH:./vendor/bin/"
Save and Exit.
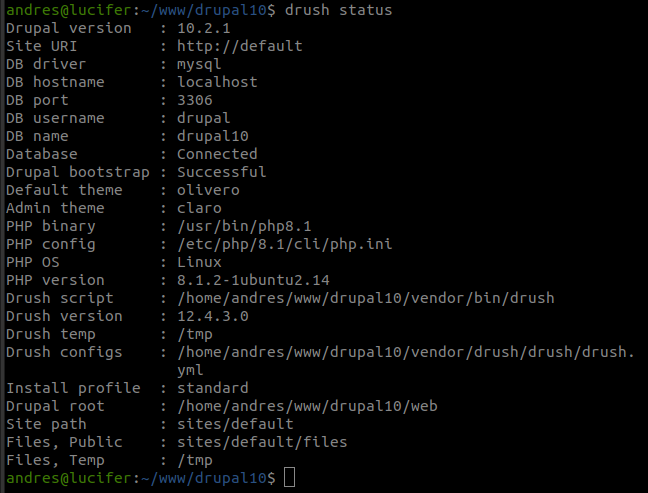
In order to test drush, move to your project docroot as described before and run drush status and if all is Ok, you should get a similar output as shown in the screenshot:
Last but not least, on previous versions of Drush (Drush 8/9) there was a nice command called drush init or drush core-init that provided a nice interface to your terminal showing you mostly the Git behavior based on your current branch or tag, etc. Unfortunately the command was removed in newer version of Drush but don't fear, with the next lines you'll be able to have the same functionality just by updating your .bashrc file. Tested on Ubuntu Server 22.04, 24.04.
## Move to HOME/
$ cd ~/

## Open file for editing:
$ nano .bashrc
Save and Exit. Once you opened the file for editing add the following at the end of the file:
##### COLOR FOR GIT IN BASH #####
export GIT_PS1_SHOWDIRTYSTATE=true
export GIT_PS1_SHOWUNTRACKEDFILES=true
export PS1='\[\033[32m\]\u@\h\[\033[00m\]:\[\033[34m\]\w\[\033[31m\]$(__git_ps1)\[\033[00m\]\$ '
##### END COLOR FOR GIT #####
Save and Exit. More info about this can be found in this link.
It is a good approach to have Apache Solr running specially for big projects, if you want to also configure Apache Solr in your Virtual Machine, check out this blog on How to configure Apache Solr for your Drupal projects!
Note: If you install Solr following the guide above, the NAT rule to access Solr in your Virtual Machine was already added when we first configured our Virtual Machine settings here, it is set to port 8983 which is the Solr default port, but if you change it for some reason, make sure to update the NAT rule or add a new one!
7.- VIsual studio code (ide)
Is worth to mention that for any IDE you use for remote development you just need to enable any SSH plugin/extension available for it so you can connect to your Virtual Machine/Remote Server and access your Drupal files, for example I use Visual Studio Code and the basic plugins I use are shown in the next screenshot:
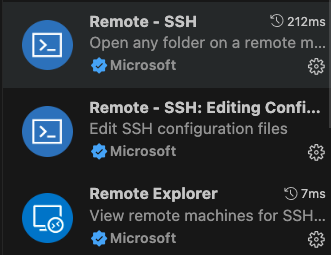
Follow the Drupal Guide for Visual Studio Code for more extensions and configurations.
It is recommended by VSCode to set up Public Key Authentication method when working with Remote environments, in order to do that, let's generate a set of public/private keys in our HOST machine (Mac or Linux) and then copy the Public Key to our new Virtual Machine (Guest):
## Move to your HOME folder:
$ cd ~

## In your HOME folder run:
## Create new RSA keys, follow the steps, dont create a password!
$ ssh-keygen -t rsa -b 4096 -C "email_address@local.com" -f ~/.ssh/id_rsa_vps

## Copy new pub key to remote server:
$ ssh-copy-id -p 2222 -i ~/.ssh/id_rsa_vps.pub localhost
Note: You can always use an existing private/public key pair as well instead of creating a new one, just make sure you copy the pub key over to your VM using the command above or adding the pub key manually to the authorized_keys file located in /home/your-user-name/.ssh/authorized_keys
Once you are done with the above, I recommend to create a config directive on your ssh configuration file so you can easily access it by just typing a name for your VM ssh connection, it's easier instead of always typing "ssh localhost -p 2222" in your terminal to login, to do so, edit the following file and add:
## Edit the ssh config file
$ nano ~/.ssh/config

## Add the following directive:

## Virtualbox VM - MY_VM_NAME
## Replace cool_name with a nice name easy to remember
Host cool_name
    HostName localhost
    PreferredAuthentications publickey
    Port 2222
In order to test, just type in your terminal "ssh cool_name" and you should be automatically logged in.
If this is working, VSCode will automatically detect your connection and make it available in the "Remote Explorer" section in the left bar:
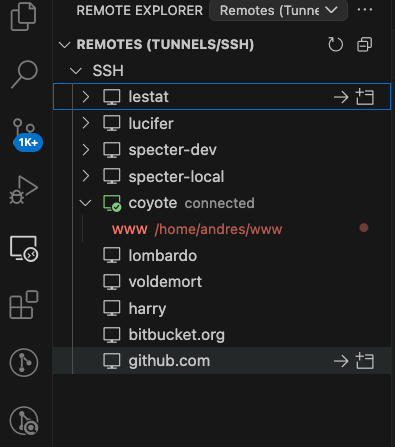
From there you can open all the files on your Virtual Machine in the editor and create a Workspace for your projects!
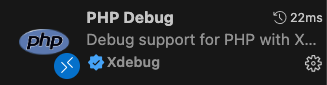
For Xdebug, use the following extension:
In order to enable Xdebug in VSCode you need to create a launch.json so once you have installed the extension above, click on the "Run and Debug" button on the left bar of VSCode ![]() then click on "Add new configuration" and finally you can remove pretty much everything but the first entry in the configurations array and replace it with the following, make sure you replace the values for pathMappings based on the right path you set up for your projects in you Virtual Machine, in this post we used /home/my-user-name/www
then click on "Add new configuration" and finally you can remove pretty much everything but the first entry in the configurations array and replace it with the following, make sure you replace the values for pathMappings based on the right path you set up for your projects in you Virtual Machine, in this post we used /home/my-user-name/www
"name": "Listen for XDebug",
"type": "php",
"request": "launch",
"hostname": "127.0.0.1",
"port": 9003,
"pathMappings": {
    "/home/<my-user-name>/<path-to_my-projects>": "${workspaceFolder}"
}
Note: Since we already opened a NAT rule for Xdebug when we first configured our Virtual Machine, there is no need to worry. But keep in mind that if you change the default Xdebug port (9003) for some reason, that rule will need to be updated!
Alright, that is all with this tutorial, hope you enjoyed this post, I understand it's quite a "long" process for setting up a LAMP Stack for Development at first but once it's done, the process will require small effort in terms of configuring existing or new projects since is just a matter of getting the project files, set up a database a VirtualHost and voila! But overall you have learned more about what's under the hood of Dockerized Development solutions, how to properly set up a LAMP Stack from scratch and understand the Linux steps to host a PHP/Drupal application and of course improve performance.
Please share your thoughts, I'll be happy to help on any questions that might arise!